Calculate Distances Between Locations on Your Custom Maps
Research by Scientific American shows that humans are not very good at estimating distances. Luckily, we have computers to help us much of the time, such as our vehicle’s GPS or driving directions on a website. It’s only natural that you’d also want to use these with your own custom locations. These distance calculations can be important in many cases, from sales and customer visits to deliveries. One error could mean a lot of time, not to mention money, wasted.
Instead of calculating distance manually or relying on scientifically proven poor estimates, use tools that take out all of the guesswork.
Let’s go over one such tool, our mapping software, which has multiple ways of determining the distance between your points, starting with point selection.
1. Select Your Points
Let’s start by selecting the locations on your map that you want to calculate the distance between. If you don’t already have a map, here’s how to prepare the data of your choice for our copy-and-paste mapping tool.
There are multiple ways you can select your points, including:
- Selecting rows on a table via Data View
- Using Advanced Mode’s selection tool shapes:
- Rectangle
- Circle
- Polygon
Right-click (or hold control and click on Mac) any BatchGeo map to bring up additional ways of viewing (i.e. Data View) along with other options. If you’re a BatchGeo Pro user, among these is Advanced Mode.
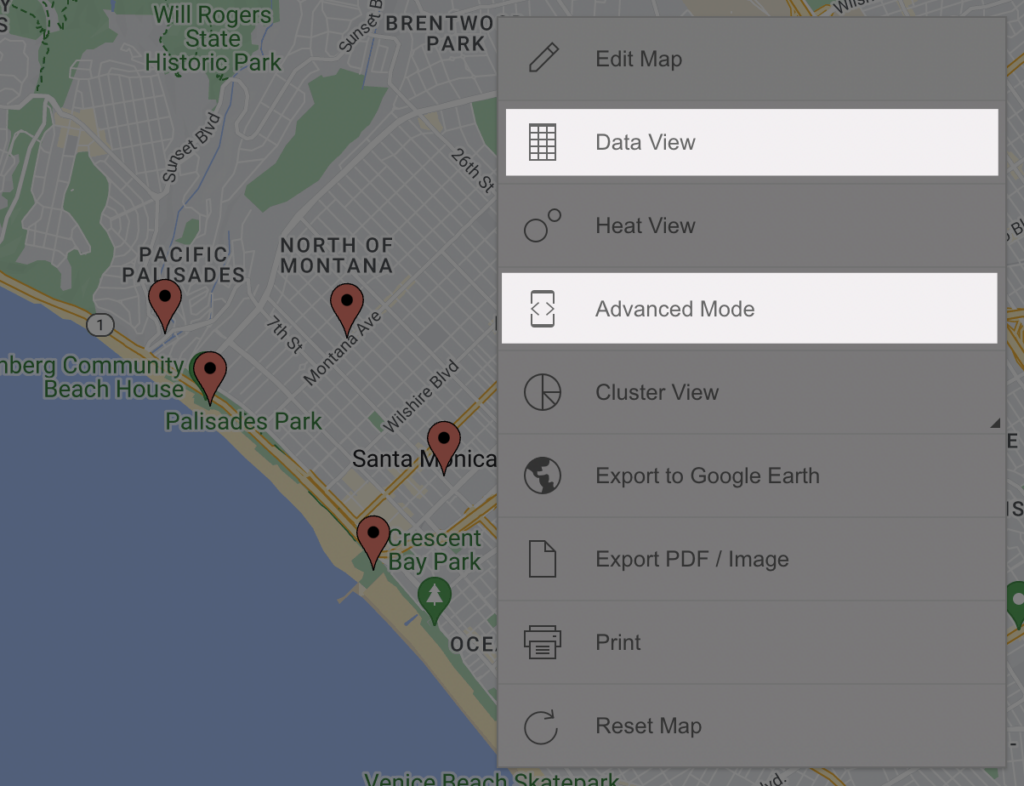
You can use either Data View or Advanced Mode to select your points for distance calculations.
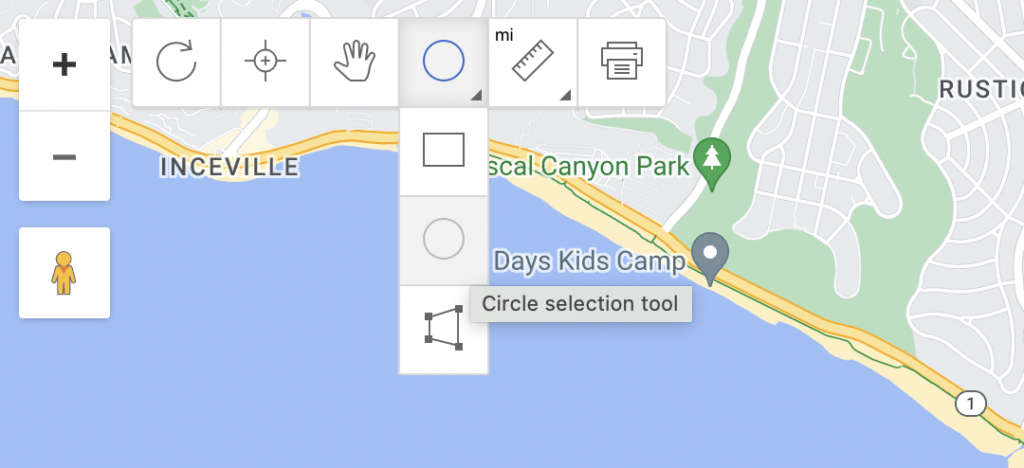
Advanced Mode will reveal even more selection tools in the upper left-hand corner of your map (the Rectangle, Circle, and Polygon selection tool). Choose a shape and then draw it to capture your points.
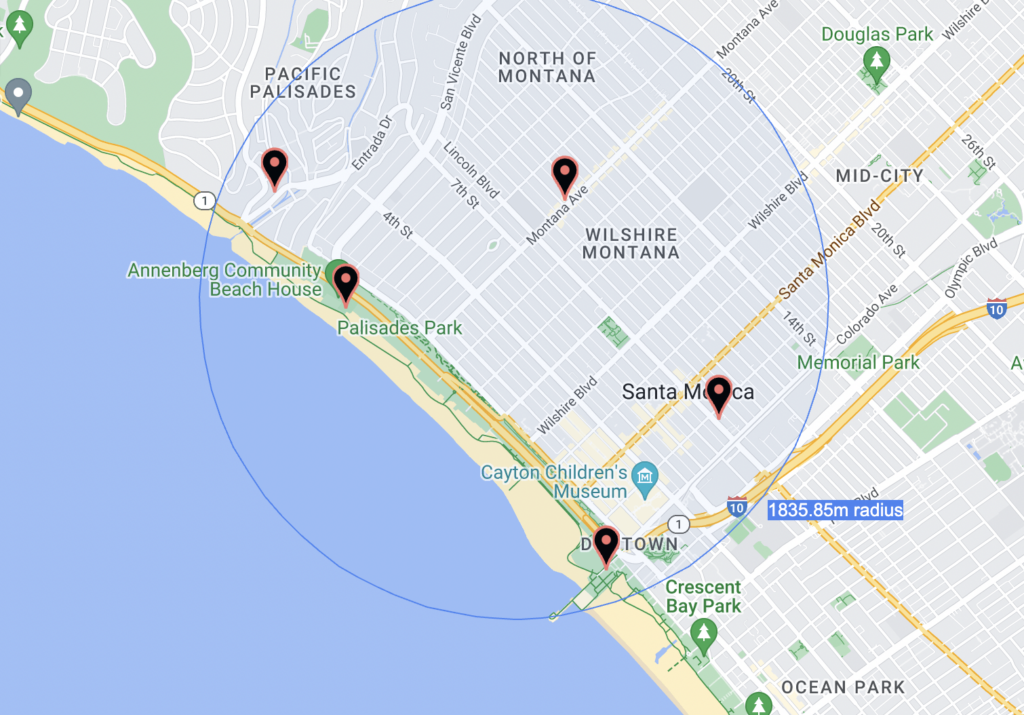
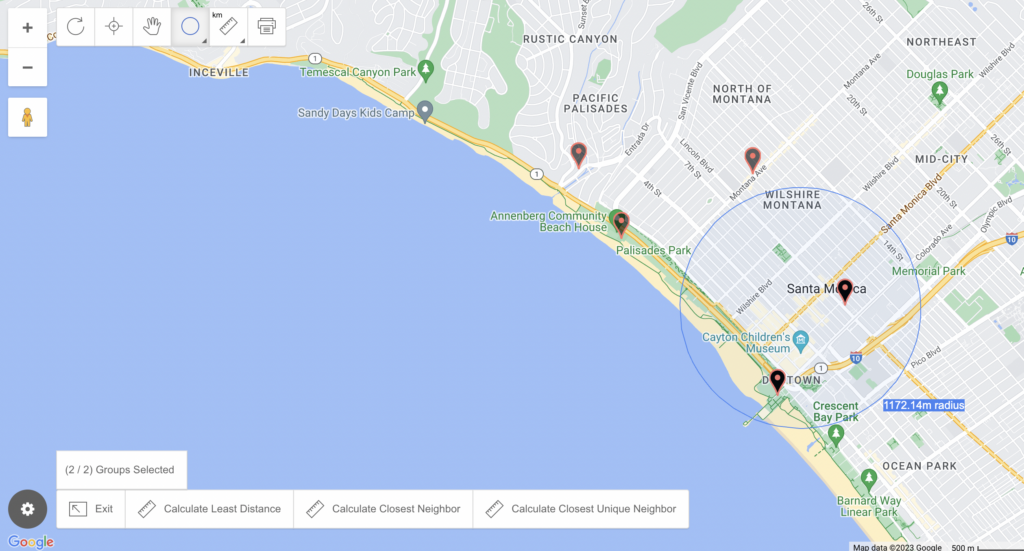
Depending on which of the distance calculation tools you want to use, you’ll select one or two groups of points.
2. Calculate Distances Multiple Ways
With our points selected, we can now move on to using our various distance calculation tools: Match Closest Pairs, Match New Selection, and the multi-distance tool.
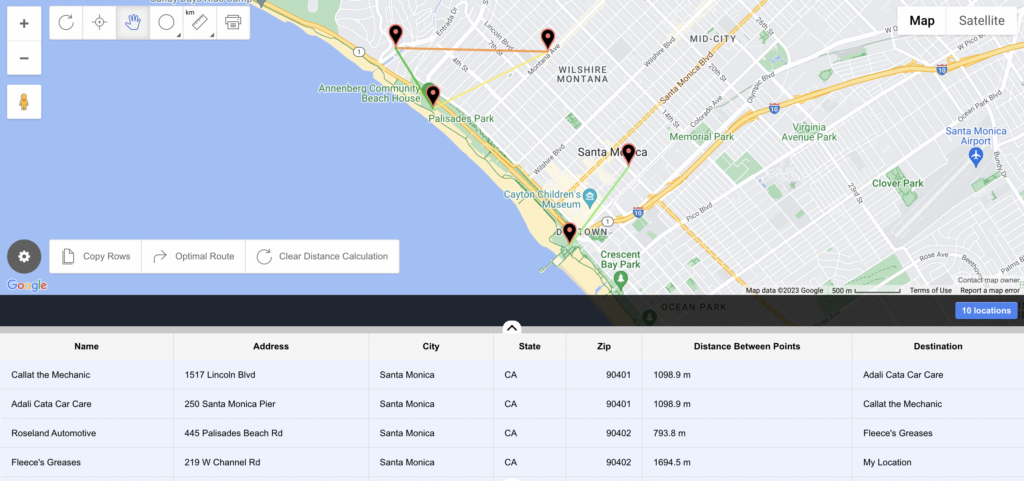
Match Closest Pairs
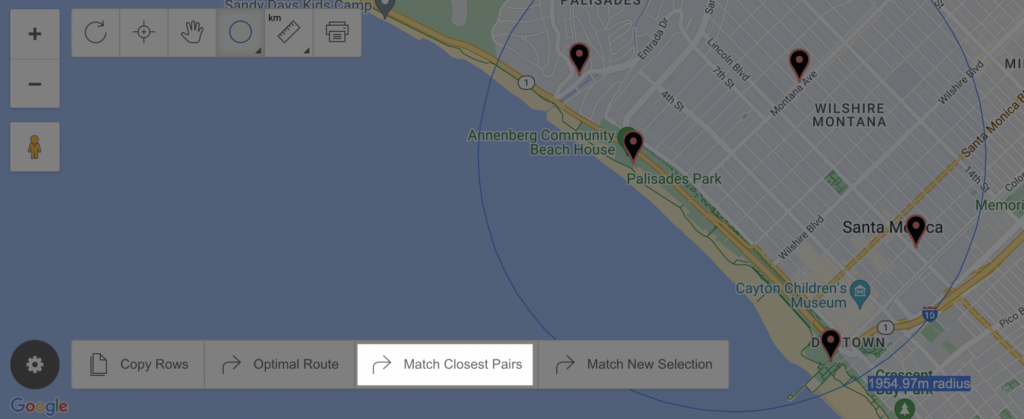
Once you select your points, you’ll see options near the bottom of your map. Choose Match Closest Pairs if you wish to use only your currently selected points. Then, pick from one of the following options that pop up:
Interactive Maps Made Easy
Sign Up Now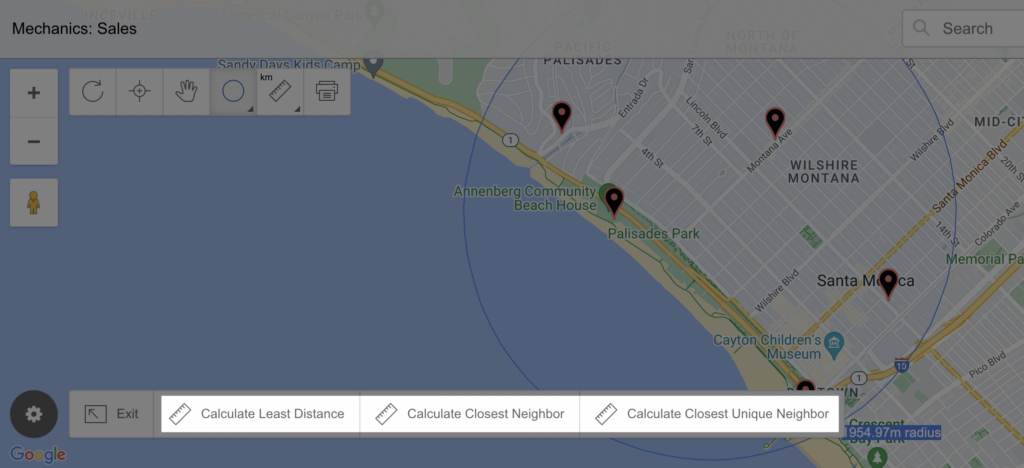
Calculate Least Distance goes through each point and finds its nearest point that hasn’t already been selected. You end up with pairs that are near each other. Odd numbers of points will leave one out.
Calculate Closest Neighbor goes through each point and finds its nearest point overall. There will likely be duplicates, but you know each place’s nearest other place.
Finally, Calculate Closest Unique Neighbor goes through each point and finds its nearest point. If there’s a duplicate, it favors the closest. In the end, you have the closest distances that don’t repeat any locations.
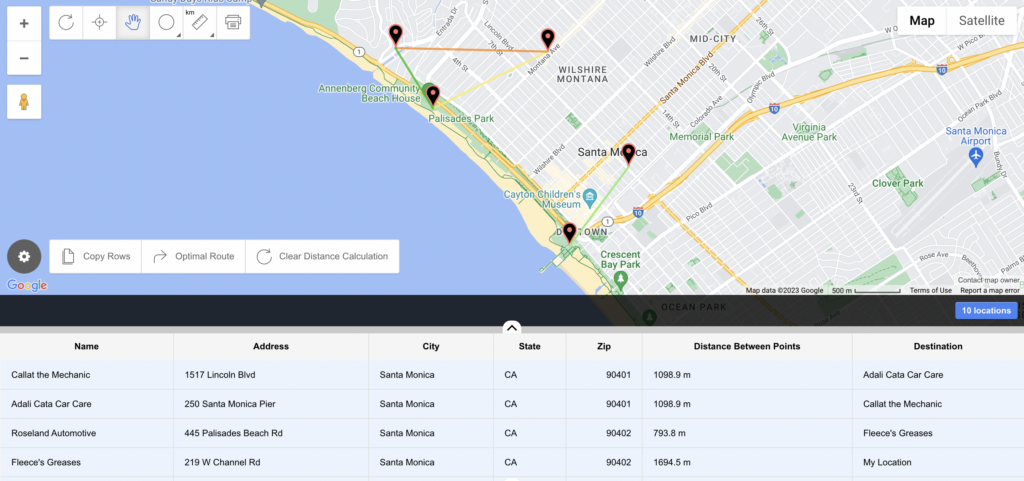
Note that each of these options will add a new column to the “Data View” of your map, displaying the distance between each of the points involved.
Though Match Closest Pairs covers the most common use cases, there are still other ways you can calculate distances.
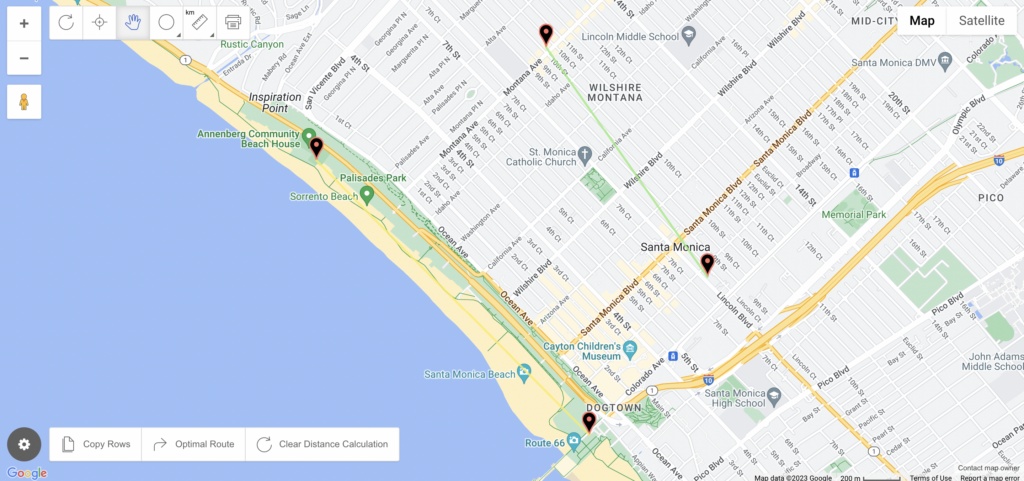
Match New Selection
There’s a second distance calculation choice when you’ve selected your points: Match New Selection. This option brings up the same sub-prompts as Match Closest Pairs.
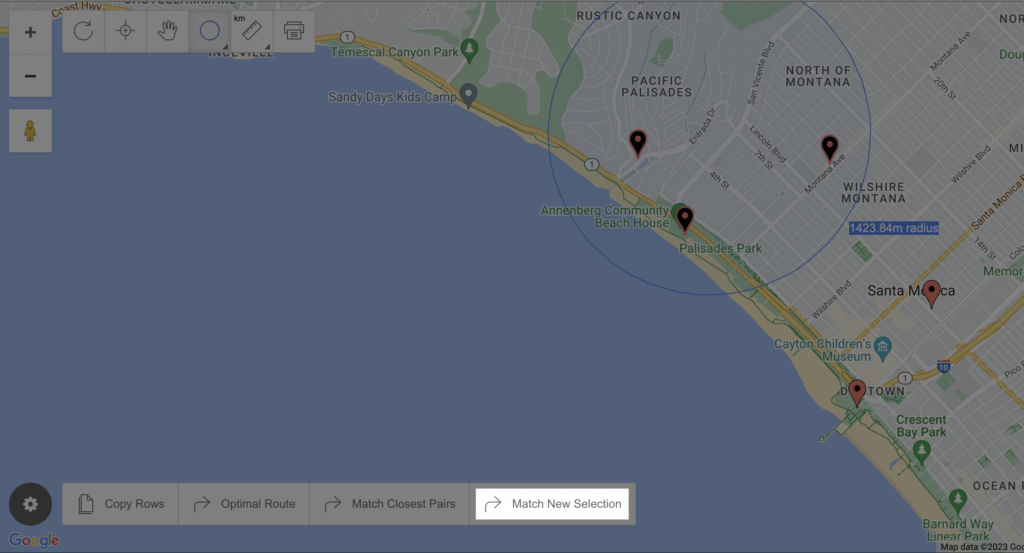
However, instead of only selecting an initial group of points, when you’re using Match New Selection, you’ll select a second group to compare to the first.
How to Match New Selection:
- Select your first group
- Click Match New Selection
- Select a second group
- Choose one of the three options (Calculate Least Distance, Calculate Closest Neighbor, Calculate Closest Unique Neighbor).
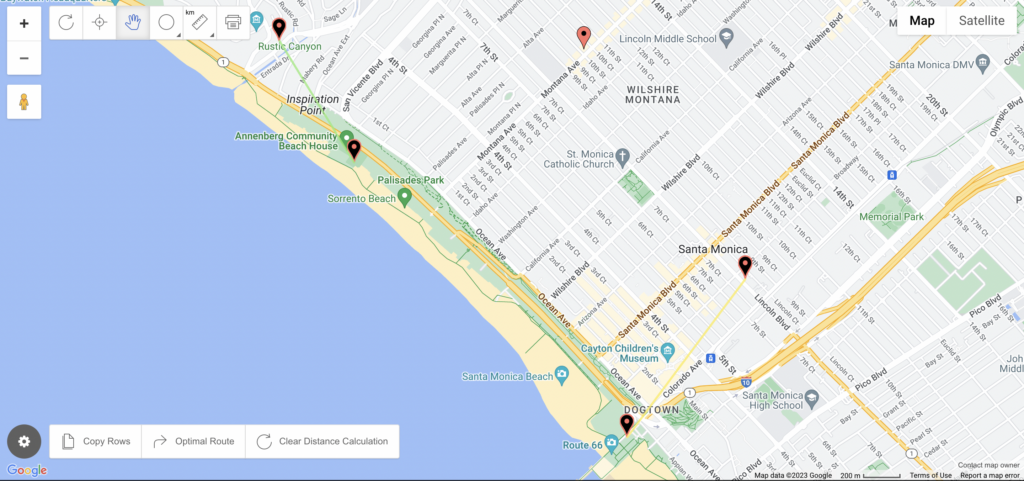
Without a second group of points, you won’t be able to select one of the sub-prompts, as you can see here:
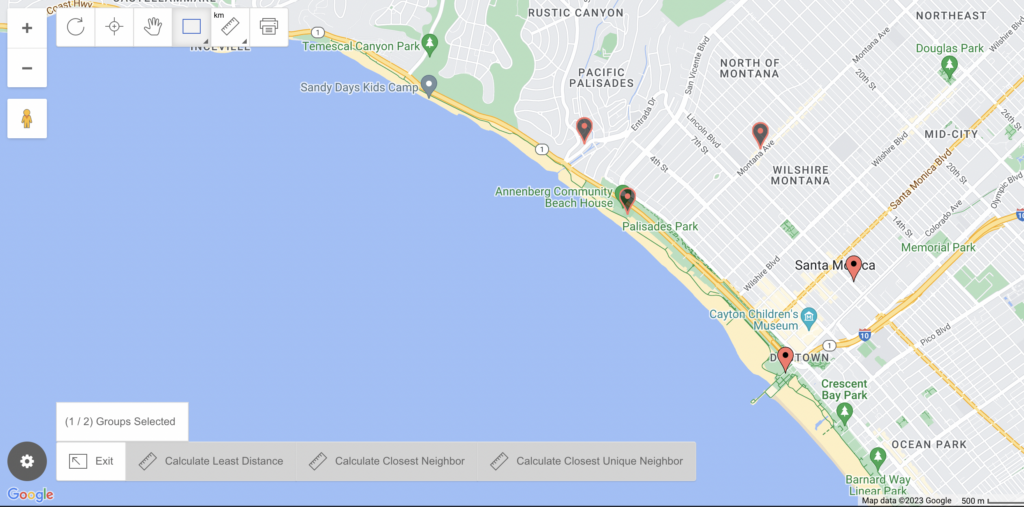
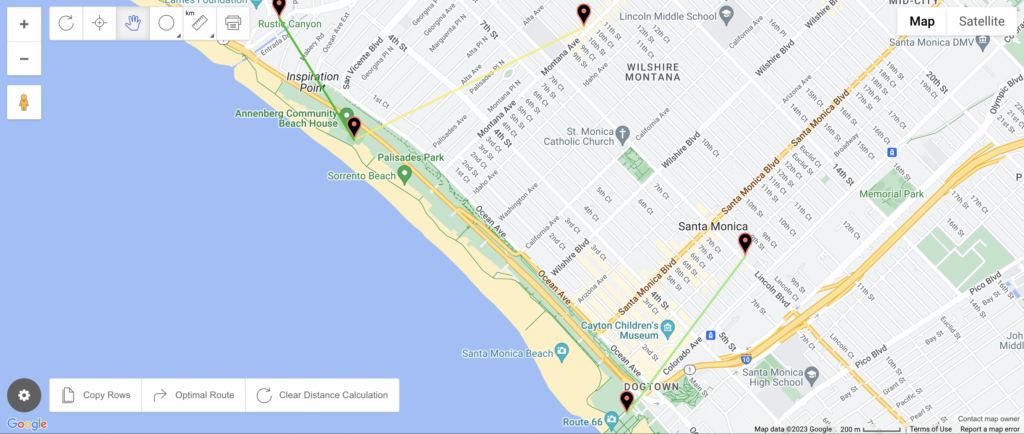
Once you’ve selected a second group, you’ll see the familiar prompts from which you can choose (i.e. Calculate Least Distance)
While the options work the same, Match New Selection always looks to connect each point in the first group with a point in the second group.
These two methods of matching locations with distances can help you make sense of many points at once. The final distance calculation method is useful when you’re looking for answers about a smaller number of points.
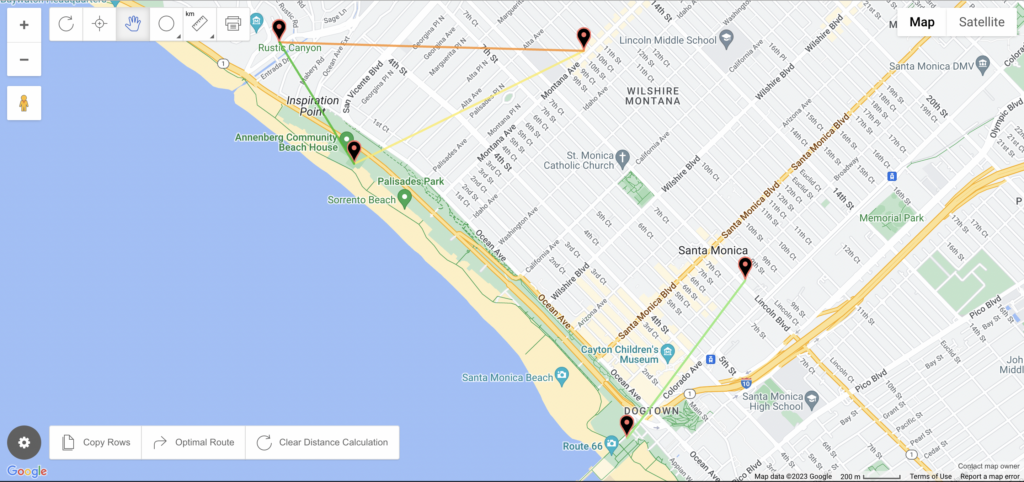
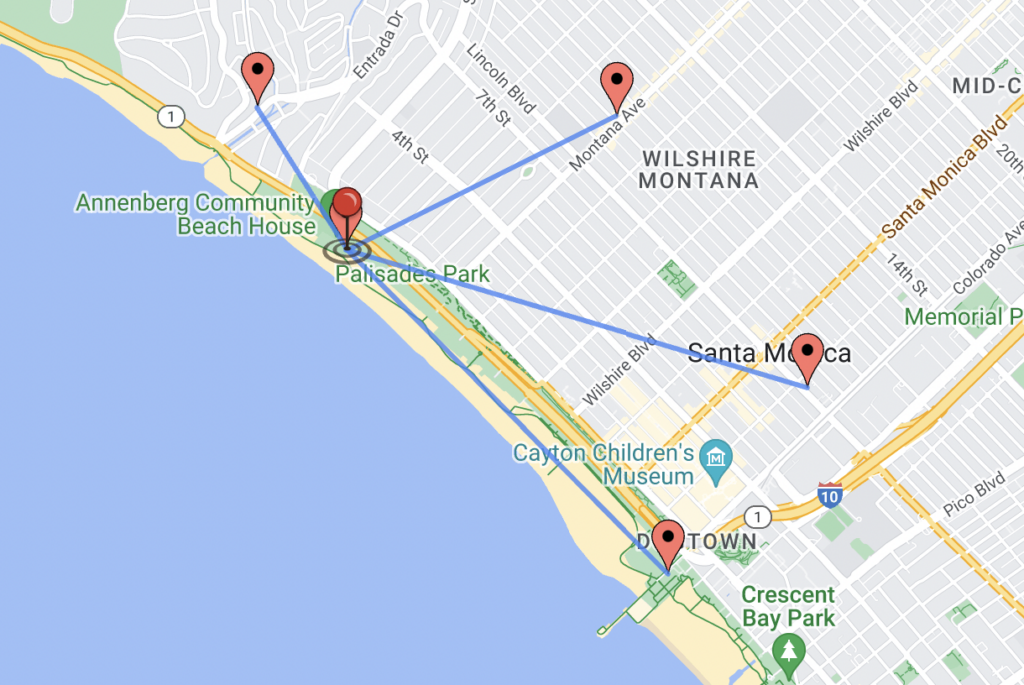
Marker Measure Tool
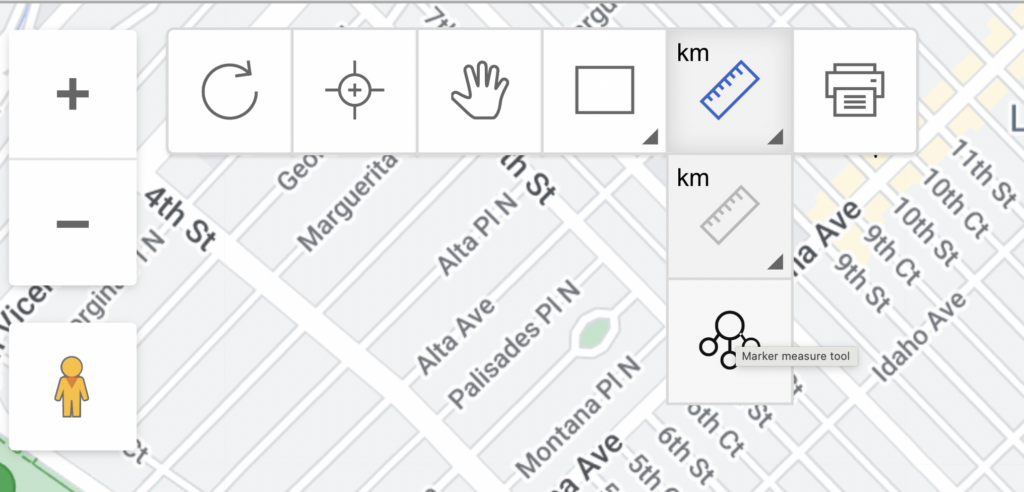
The Marker Measure Tool is another Advanced Mode feature, though it lives in the upper left-hand corner of your map under Measuring tools.
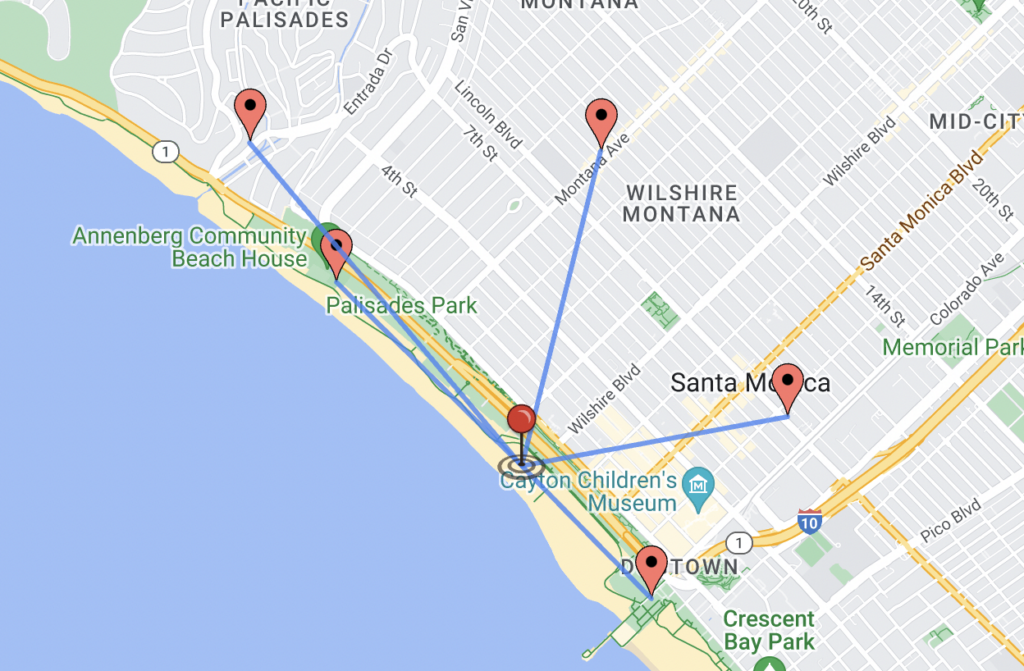
There’s no pre-selection needed with this tool. Just click it and then drag the pin on top of the location, which could be a current marker on your map or not, you want to know the distance of from the rest of your points.
Map Your Data to Determine Distance
View Mechanics: Sales in a full screen map
You can calculate distances in completely customizable ways—all when you follow the steps to map your data with our tool.
- Open your spreadsheet
- Select (Ctrl+A or Cmd+A) and copy (Ctrl+C or Cmd+C) your data
- Open your web browser and navigate to batchgeo.com
- Click on the location data box with the example data in it, then paste (Ctrl+V or Cmd+V) your own data
- Check to make sure you have the proper location data columns available by clicking “Set Options”
- Click “Map Your Data” and you’re done!
Start calculating the distance between your points today at batchgeo.com.
