How to Share Your Maps on Social Media
There are many custom maps you can make online, such as a neighborhood garage sale map or even a Google Maps store locator without code. While maps made for your eyes only can be helpful, they become even more powerful tools when shared. Whether you want to share your custom maps on social media via the web or on a mobile device, it’s easy to do with BatchGeo. Just obtain an image of your map—a screenshot or the high-resolution file you get with BatchGeo Pro will suffice.
Once you have your image, you’ll want to ensure it fits the ideal dimensions of your preferred social media platforms (we cover the sizing requirements below). Then, you’re ready to share the image of your map and the link to your website or map with your friends and fans on Facebook, Instagram, or Twitter.
The top social media platforms don’t permit users to embed HTML within posts. This means that when you share your maps on Facebook, Instagram, or Twitter, users won’t be able to interact with your map the same way they can when they see it on BatchGeo or embedded in your website. While we check in with Mark Zukerberg and co. about this, you have several options to get your location data in front of friends and followers on the world’s largest social media platforms through the use of image posts. Your options include taking a screenshot of your map or downloading a high-resolution PNG image (a BatchGeo Pro feature).
Take a Screenshot of Your Map
The first way to get an image of your map suitable to share on social media is also the most customizable: take a screenshot of your map. Use the built-in screenshot feature of your computer to grab a portion of your screen: Windows + Shift + S on Windows 10 or Command + Shift + 4 on Mac. On Windows, you’ll be directed to the Snipping Tool or the newer Snip & Sketch. On Mac, you’ll need to drag the crosshairs cursor across the area of the map you wish the include in your screenshot. Once you have your desired area covered, simply let go of your mouse to take your screenshot.
Interactive Maps Made Easy
Sign Up Now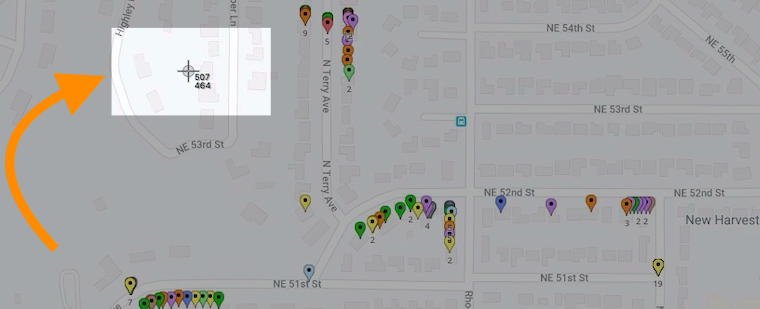
You can also take a screenshot of your map via your Android or Apple smartphone. On an iPhone 8 or earlier, press the Top or Side button and the Home button at the same time and quickly release both buttons. On an iPhone X or later, press the Side button and the Volume up button at the same time and quickly release both buttons. For any Android phone, locate your device here to learn how to take a screenshot.
Taking a screenshot of a specific area on your map—whether on a computer or mobile device—allows you to control and customize the area of your map you’d like to share. You can zoom in and out of BatchGeo maps on both a web browser or mobile device. You may choose to zoom in on one location, making it the focal point of your image, or zoom out to capture your map as a whole.
Download BatchGeo Pro’s High-Resolution PNG Image
The second way to get an image of your map to share on social media is by utilizing a BatchGeo Pro high resolution, printable PDF or PNG file. To make use of this feature, right-click on your map within the BatchGeo web browser. Click Export PDF / Image and select PNG Image and High Res 11” x 17” Printout. A clear, high-quality PNG image of your map will be downloaded on your computer. You either can upload the image from your computer into a social media post via a web browser or, if you’d like to do so on a mobile device, send the image to your phone and upload accordingly.
Resize Your Images to Look Their Best
Each of the three top social media platforms has their own ideal sizing dimensions when it comes to sharing images. We’ll list the specifics for each platform below so that you can adjust your screenshot or high-res image to fit those dimensions. Another option is to use a tool like Sprout Social’s free Social Media Image Resizer to ensure your social media posts always look their best.
Ideal Image Sizing for Facebook
Facebook’s ideal image dimensions are 1,200 pixels wide and 630 pixels tall. Once you have resized your photo, select Photo/Video on your Facebook feed and select the image. To share an image via the Facebook mobile app, send the optimally-sized image from your computer to your phone. Then, open up the Facebook mobile app and upload the image.
Whether you plan to share a screenshot of your map or the high-res image BatchGeo Pro provides, be sure to include a status that links back to your own website or map so users can easily click over to the interactive version.
Instagram’s Ideal Image Sizes
Instagram users expect high-quality images when browsing on the app. We can use the same methods we used to obtain a screenshot of your map or use BatchGeo Pro to download an automatic high-resolution, printable PNG image. You’ll just need to adjust the dimensions before you share your map in an Instagram story or post.
Instagram Story
The ideal dimensions for sharing a map in an Instagram story are 1,080 x 1,920 pixels. You can manually edit your screenshot or high-res image to fit those dimensions, or you can use a social media image resizer tool. Once you have the image of your map in the correct size, send it to your phone. To add it to your Instagram story, click the Camera button on the top left corner of Instagram and select it from your camera roll.
Of course, as with Facebook, it’s important to share your image with a link to either your website or to the map itself so users can view the interactive version. As Instagram only allows you to post direct links in your stories if you have over 10,000 followers or you’re a verified user, you can add the link to your bio (which is clickable for everyone) and point users there for easy navigation.
Instagram Post
Instagram posts have different ideal dimensions than their story counterparts. To share an optimal-sized screenshot or high-res image of your map in an Instagram post:
Interactive Maps Made Easy
Sign Up Now- Adjust the size to be 1,080 x 1,080 pixels for a square photo, 1,080 x 566 pixels for a horizontal image, or 1,080 x 1,350 pixels for a vertical post
- Or, upload the image to a social media image resizer
- Then, share the image to your phone and post it on Instagram by clicking at the bottom of the screen → Library (iOS) or Gallery (Android) at the bottom of the screen and select the photo of your map you’d like to share
- Add a hashtag or two, such as #batchgeo just like these other BatchGeo users did.
Once again, it’s always important to share a link either to your website or to the map itself so users can view the interactive version of your map’s image. Yet, Instagram also prevents clickable links in your captions. Stick it in your bio instead and let your followers know you did so.
Ideal Image Sizing for Twitter
To share your map on Twitter, use a screenshot, or high-res image. Ensure the image will look it’s best on Twitter’s platform by re-sizing it to Twitter’s recommended size dimensions of 1024 x 512 pixels. Then, upload your image using Twitter in your web browser or on your mobile device.
It’s time to share your maps with friends or fans use either using a screenshot or the printable, high-res images you get with BatchGeo Pro. Share to Facebook, Instagram, Twitter, Tumblr, or even Pinterest using the same methods as described above: obtain a screenshot or high-quality image and post to the social media platform with a link to your website or map. Knowing the right dimensions for each platform, or letting an online tool do it for you, will ensure your personal or business social media profile looks great 100% of the time you share your maps.
