How to Map Multiple Locations on Google Maps
If you’re attending an out-of-town class reunion or an eventful wedding, wouldn’t it be nice to see the locations you’ll need to attend in one place? After all, there are nearby hotel options and other accommodations you may need to remember. Since this information is location-dependent, a single map with multiple locations would be ideal.
Knowing how to map multiple locations on Google Maps can come in handy on occasions like these and many more. Whatever your reason, you can use BatchGeo to map multiple locations on Google Maps. It’s a straightforward process:
- Gather your multiple locations in a spreadsheet
- Copy and paste your spreadsheet into BatchGeo
- Customize the multiple locations on your map
With these three steps, you’ll know how to map multiple locations on Google Maps, resulting in custom maps like the one below.
View Make a Map of My Location and Favorite Places in a full screen map
But wait, BatchGeo isn’t the same as Google Maps—or is it? BatchGeo uses the Google Maps Geocoding API to map and display your multiple locations on Google Maps. Geocoding is the process of converting addresses, cities, states, zip or postal codes into mappable coordinates. The result of using the Google Maps Geocoding API through BatchGeo? A customizable Google Maps map that doesn’t require you to write any code or manually geocode addresses one by one like you may have to do with other services. BatchGeo performs everything you need to do in a few easy steps, starting with gathering the multiple locations you want to map in a spreadsheet.
Gather Multiple Locations in a Spreadsheet
To start mapping your multiple locations, you’ll need to add them to a spreadsheet like Excel or Google Sheets. You can add up to 25,000 locations to a spreadsheet that will be turned into a map with BatchGeo Pro, or up to 250 locations with the free version.
One best practice for formatting multiple locations in a spreadsheet for mapping purposes includes adding at least two columns. One column can be for the name or title of your locations while the second can be for your location data, as shown below.
Interactive Maps Made Easy
Sign Up Now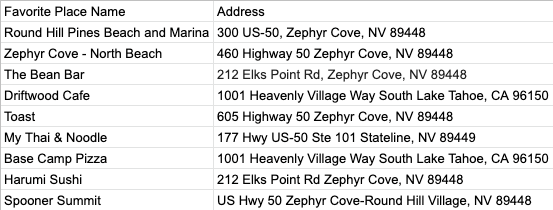
With just the names and multiple locations, you can create a basic map like the one below:
View Basic Map of Multiple Locations in a full screen map
But, seeing how you have multiple locations, you may want to make your map easier for yourself and any others to navigate. Enter map grouping. With map grouping, you can filter your map by certain markers, allowing you to focus on what matters.
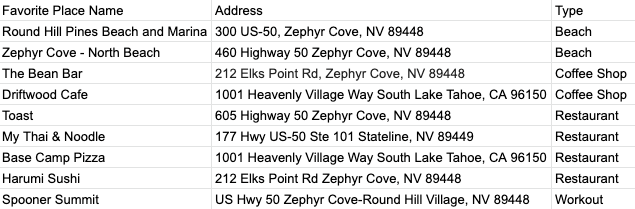
With numerical data, map grouping can automatically identify various ranges so that you can filter out what you don’t want to see at that moment. With non-numerical data, it groups fields with the same values, allowing you to see the commonalities in your data. This is especially useful for types or categories. For example, we assigned our multiple locations common types like beach, coffee shop, restaurant, and workout, as shown below.
With names or titles, addresses, or other location data, and types or categories of the multiple locations in your spreadsheet, it’s time to move onto step two of how to map multiple locations on Google Maps: copying and pasting your data into BatchGeo.
Copy and Paste Into BatchGeo
Using our mapping tool, you can just copy and paste in your spreadsheet. Then, click “Map Now” which will allow you to validate & set your options. You don’t need to customize the map—if your data is simple, you can probably skip the options completely. However, they allow you to fine-tune the headings, which is especially useful if you have multiple location columns.
Note the basic options first:
- Region
- Location / Address
- City / County
- State / Province / Postcode
- Zip / Postcode / Country
- Group By / Thematic Value
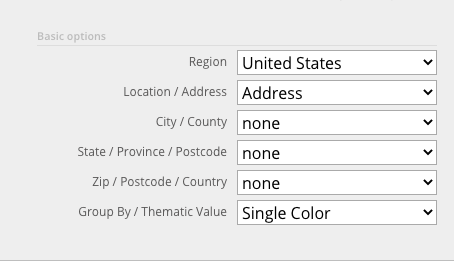
Identify the region of your data, and set the Location / Address to the correct column from the spreadsheet you copied and pasted. Do the same for the rest of the location values if you had different columns with city, state, zip, or country data. Finally, if you assigned types or categories to your data in the spreadsheet, select the column you’d like BatchGeo to group by. After the basic options are set, you can scroll down and click Save & Continue or select Show Advanced Options under the basic options you’ve identified to further customize your map.
Customize the Multiple Locations on Your Map
BatchGeo allows you to further customize your maps after you set the basic options. Additional fields you can change related to the data you copy and pasted from your spreadsheet include the Title of the location marker, the Marker Description, Country Field, and Image URL, among others.
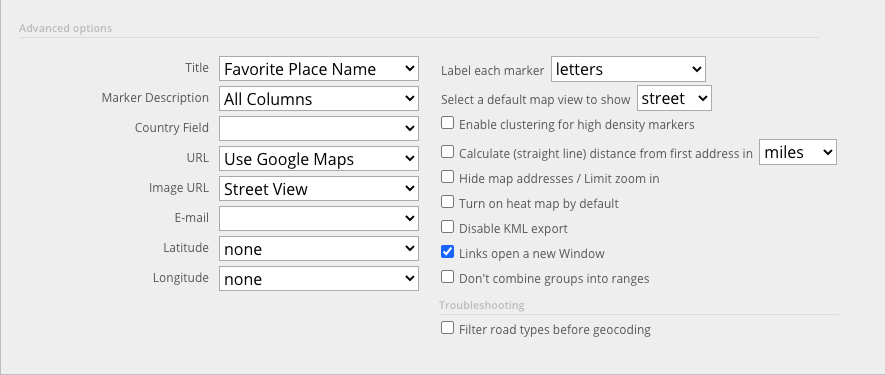
In addition to those fields, you can choose to label your multiple locations with letters or numbers. You also have the option to enable clustering for high-density markers which, if you have multiple locations on a single map, maybe a good idea.
You can even customize the map style—pick from six different background options for your map. Finally, for further customization, select your marker shape and marker color. We offer three marker shape options: the standard map point marker, a circle, and a square. Then, you can determine which colors you want to assign with each of the grouped types or categories or, select one marker color for a map with no grouping options.
Share Your Map
Once you’ve saved your map, pick a title, an optional description, determine your ideal privacy, and select the Map Mode: Data View displays the data used to create your map below it while the Store Locator is a good option if you’d like to display your data on a list that appears to the left of your map. Read more about creating a store locator here.
Then, you can opt to share your map of multiple locations with friends, family, colleagues, or even on social media by copy and pasting the link to your map of multiple locations you made with BatchGeo. Visit here for more ways to share your maps.
