3 Steps to Find Your Nearest Leads in Airtable
Whether you’re a business owner or employee, you have enough on your plate. You don’t want the collection and storage of your sales leads to remain yet another undone task on your to-do list. This is why you’re interested in incorporating Airtable—a spreadsheet-database hybrid—into your workflow.
Airtable pairs a spreadsheet with database column types along with calendar, gallery, Kanban, and other views, which makes it perfect for storing leads.
Moreover, once you have your lead base set up, you can use the information to identify nearby leads to use during sales travel.
Let’s get started building an Airtable base for leads, automating the collection, and exporting the data to find your closest lead.
1. Build an Airtable Base for Leads
Before we can identify our closest lead(s), we must first build our base. You may already have them stored, so look below to make sure you have all the fields you need. If you’re just starting out, let’s begin with the basics. Within Airtable, select Add a base (or use one of the many available Airtable templates). Give your new base a name, “Leads.”
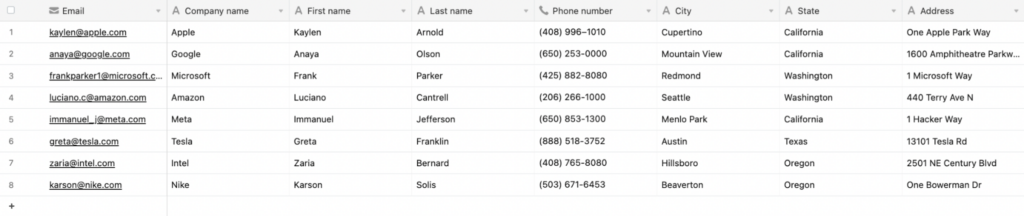
With that done, we can focus on making our base lead-specific. We’ll start with column headings, called fields. By default, things like Name, Notes, and Attachments appear in any new base.
But you can also add your own. Some basic suggestions include:
- Company name
- First name
- Last name
- Phone number
- City
- State
- Address
You can incorporate even more specific fields such as lead stage, priority, expected close date, or last contact, just to name a few. When it comes to finding your nearest leads, perhaps the most important of these are the location-related fields. Of course, yours needn’t be so U.S.-focused. Just be sure to include some location data, such as country, latitude and longitude, etc.
Now we can either fill all in the details for each new record manually or…
2. Automate Lead Collection with a Form
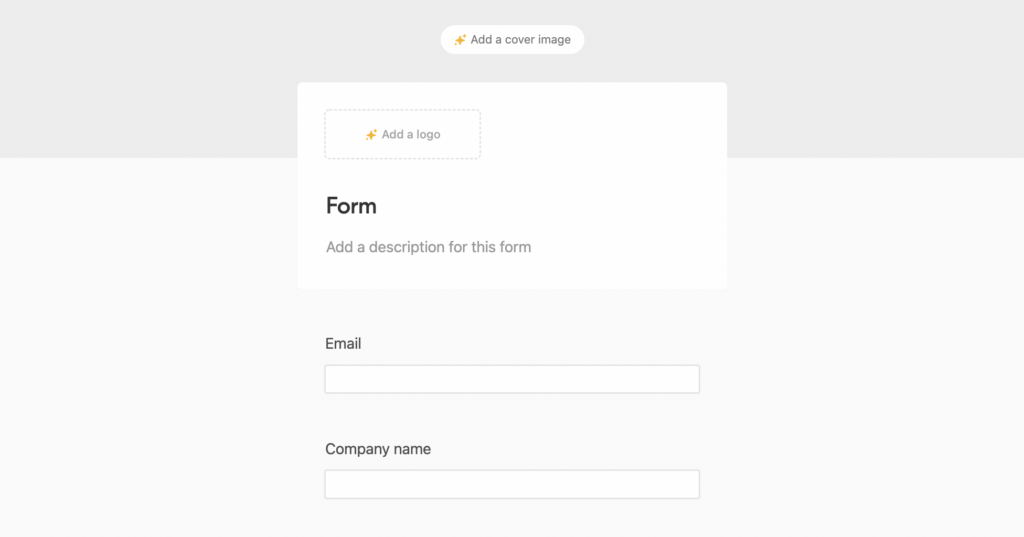
We can use forms to automate the collection of the information we need. We needn’t do much to incorporate a form into the workflow we’ve already built with our base since Airtable uses your base fields to pre-populate your form.
Interactive Maps Made Easy
Sign Up NowLet’s jump into it:
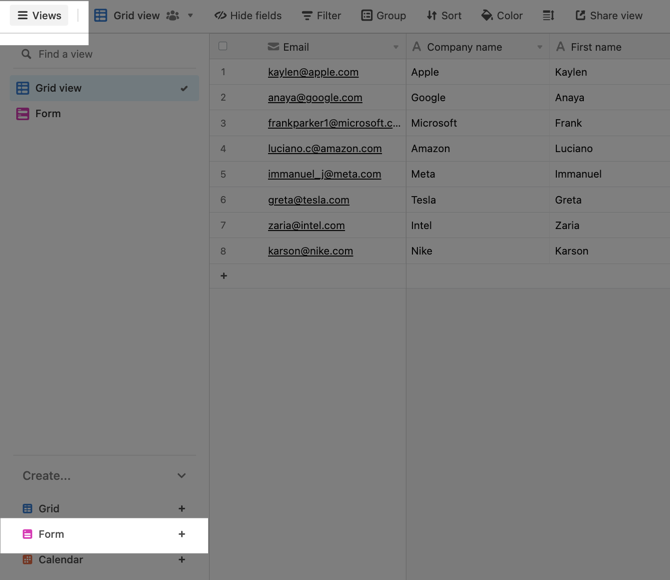
- In the Views tab of your base, select Form
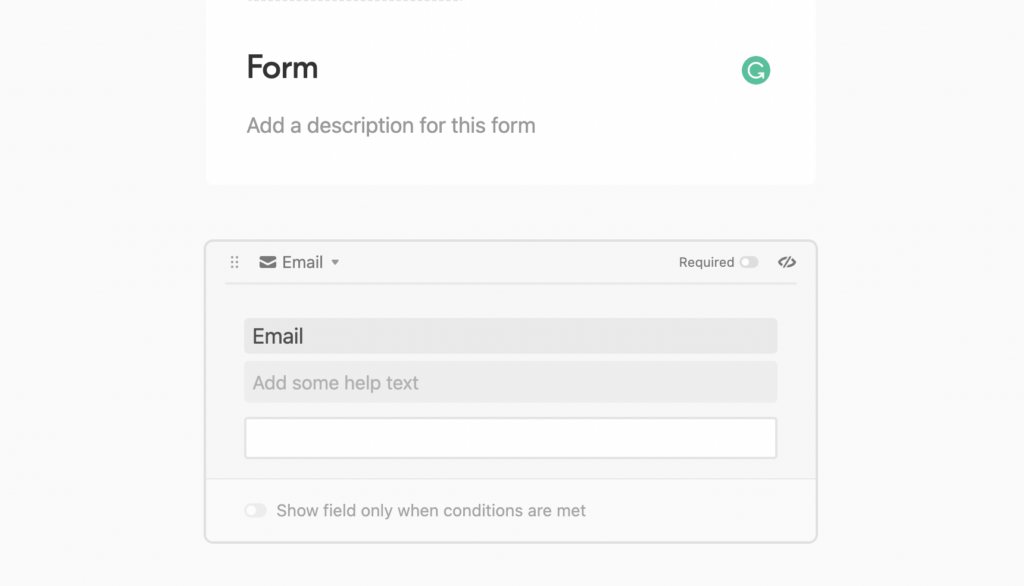
- Click the fields to edit the pre-populated information
- Here you can add additional text to clarify the field in your form
- You can also opt to set conditions for when to show certain fields, make them required, or remove fields from your form altogether
There are more ways to customize your form (logos, cover images, etc.), especially if you have a paid account. You can even share your form among team members so that everyone working in sales can add the new leads they discover.
Now that we’ve built our base and created a form to automate lead collection, we can dive into finding the nearest lead to our current location.
3. Create a Custom Map of Your Airtable Leads
View Airtable Leads in a full screen map
If your lead base doesn’t contain exact locations like addresses or latitude and longitude coordinates, it might make sense to just sort your base by city, state, or country to find which lead is closest to your location.
But if you have access to more specific location data, or you just want a way to identify your closest leads on the go, mapping your points may be your best bet.
There are two ways to do so in Airtable, as we discussed in a previous post.
Because the first involves many steps, including obtaining a Google Maps API Key, we’ll go over the second option:
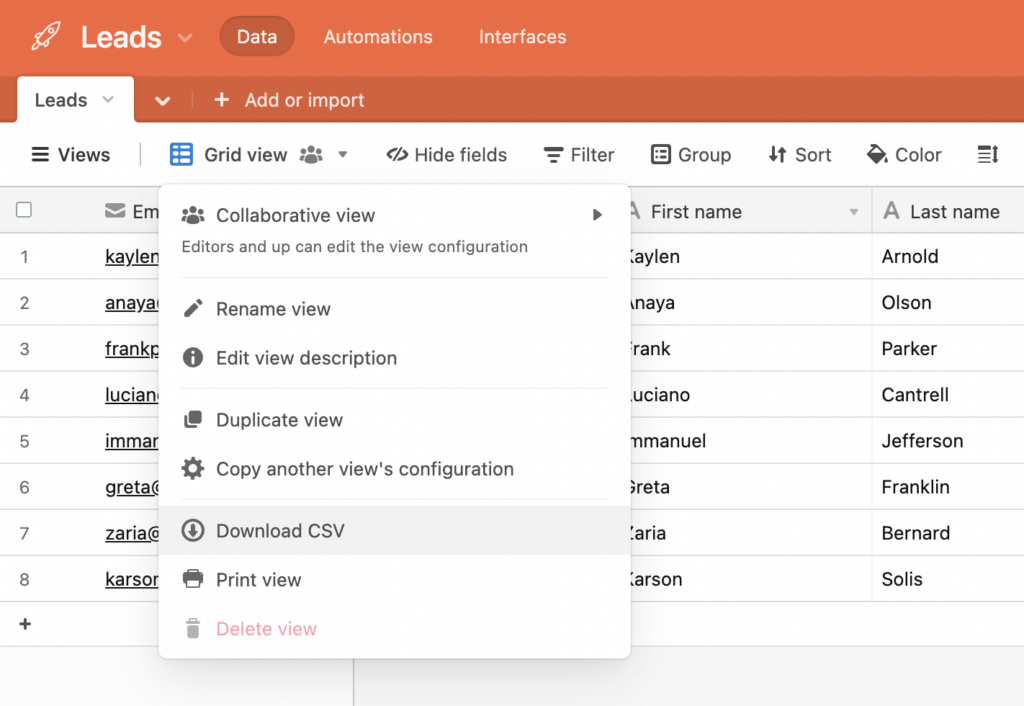
- Ensure the location information in your Airtable base has its own single line text fields
- Click Grid view and select Download CSV
- Open your web browser and navigate to batchgeo.com
- Drag and drop your downloaded file to the location data box, then click Map Your Data and watch as the geocoder performs its process
- Check to make sure you have the proper location data fields available under “Validate and Set Options”
- Select Show Advanced Options to customize marker labels, colors, shapes, and map styles
- After any updates, click Make Map. When you’re done, Save & Continue
- Optional: link your Airtable base in the Description, then click Save Map
Yet, we don’t have to stop here. While you can access your new map on your phone, which is already more helpful than a table full of addresses for seeing locations while traveling, you needn’t just estimate the map location closest to you at any given time.
Search or Measure Your Nearest Lead
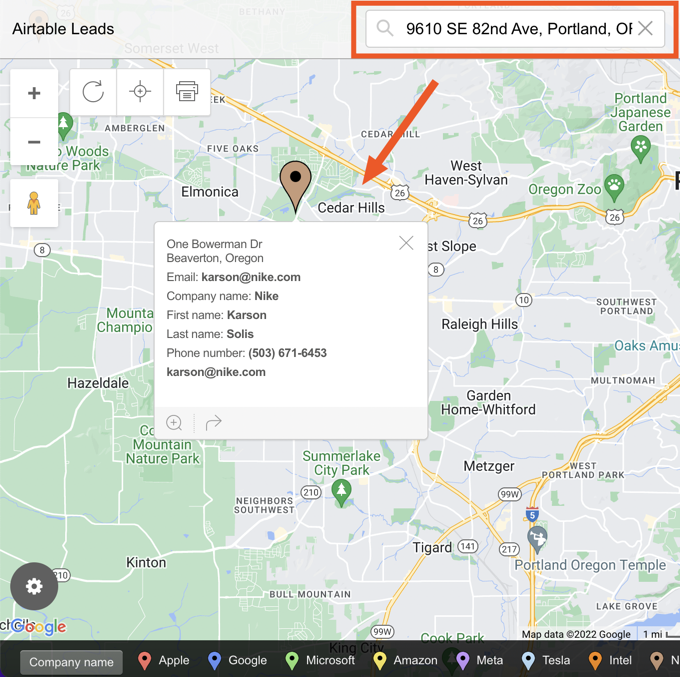
Our last step is to pinpoint exactly which lead is closest to us using our map.
Using the Search bar in the upper right-hand corner of our map, enter your current address or the address of the hotel you’re staying at during your trip. When you press Enter on your keyboard, the nearest point on our map will pop up, taking away the guesswork of eyeballing it from the map—or worse—from your Airtable base.
Map your Airtable base today at batchgeo.com.
