Two Ways to Make an Airtable Map
Do you know that one friend who never stops talking about their favorite activity? That’s us with spreadsheets. Excel and Google Sheets are reliable ways to store data and their data analysis features seem never-ending.
But sometimes you need something more. Enter spreadsheet-database hybrids like Airtable, which pairs a spreadsheet with database column types along with calendar, gallery, Kanban, and other views. Essentially, Airtable is all about providing its users a variety of data visualization options… including maps.
So we’ll show you two different ways to turn your Airtable base’s geographical data into a visual map using Airtable’s Map app or our online mapping tool. Along the way, we’ll highlight the pros and cons of each method. Let’s get started.
1. Use Airtable’s Map App with a Google Maps API Key
As an Airtable user, you can use the spreadsheet-database hybrid’s own Map app to plot your base’s geographical points on a map. The benefits of doing this with Airtable’s app include remaining in the same platform as your data, without the need for a new tool. However, in order to create a map of your base, you need to have a working Google Maps API key.
If you don’t know what an API key is or you just want an easier way, skip to the second way to turn an Airtable base into a map.
With that in mind, let’s jump into the most important step of getting started with Airtable’s Map app.
Get Your Google Maps API Key
First off, you’ll want to grab your Google Maps API key. You can re-use the same one if this isn’t your first time setting up a map app. Otherwise, here are the basic steps to get a Google Maps API key:
- Create a Google Cloud project
- Enable billing for your project
- Enable the Google Maps JavaScript and Geocoding APIs
- Create a Google API key
Whew! It’s a lot of jumping through the Google interface, but you’ll only have to do this once. Unless your usage is very high, you’ll likely never be charged. However, Google makes you add a payment option.
Interactive Maps Made Easy
Sign Up NowYou’ll need to keep that API key handy for when you set up the Map app in Airtable.
Set up the Airtable Map App

Now that you have your Google Maps API key, you’ll want to prepare your data and add the Map app so you can add your key. To do so:
- In your Airtable base, add a single line text field for addresses or latitude and longitude coordinates
- Note: you’ll need to format your coordinates in either DMS (degrees, minutes, and seconds: 44° 27’ 37.72368″ – 110° 49’ 41.295″) or DD (decimal degrees: 44.4604788, -110.8281375)
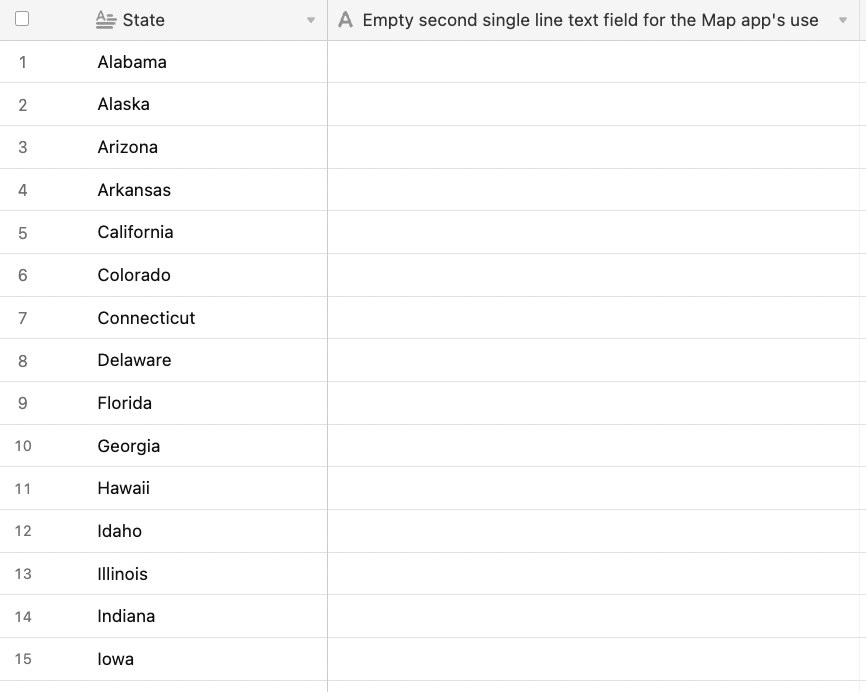
- You’ll also want to include an empty second single line text field for the Map app’s use. You can then hide this field because you don’t need to do anything with it
- Next, click Apps located in the upper right-hand corner of your Airtable base
- Select Add an app, search, and then add “Map”
- Opt to Get started and enter your Google Maps API key
- Determine the correct Table, View, Location field, and Geocode cache. Then, Save the settings

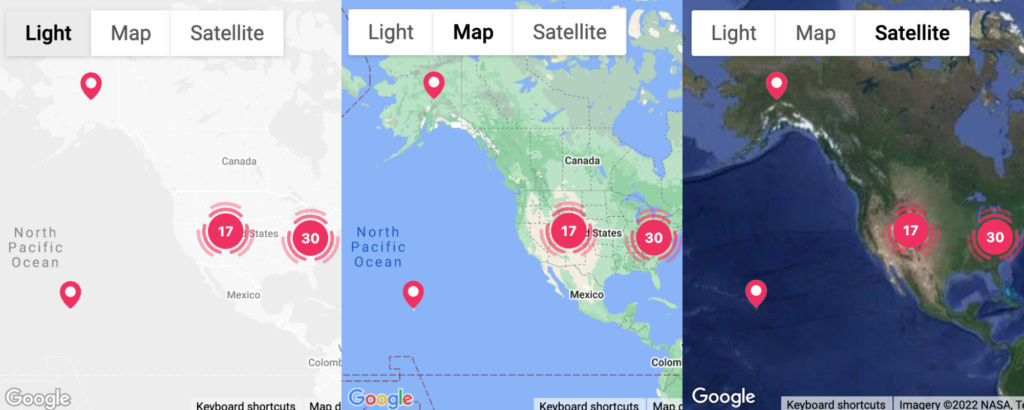
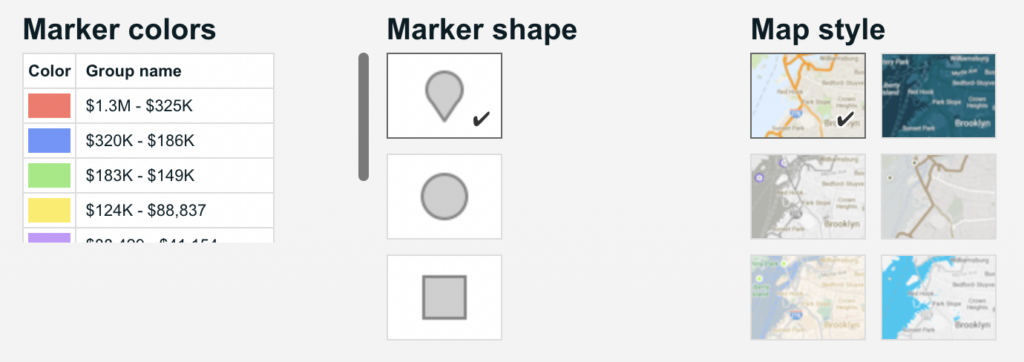
You can further customize your Airtable map by changing the marker color, size, and shape of your Airtable map, along with three map themes in Settings.
As with setting up the API key, there are quite a few steps to get your Airtable Map working. Let’s have a look at a simpler approach to getting your Airtable data on a Google Map.
2. API Key-Free Online Mapping Tool
Even the most devout Airtable user may not wish to go to the trouble of obtaining an API key and preparing your base to use the built-in Map app. So for an Airtable map alternative with no API key required, you can try our online mapping tool. And since we can skip the steps of adding an API key, we can get right into preparing your data and adding it to BatchGeo:
- Just like the previous method, you’ll want to ensure any location information in your Airtable base has its own single line text fields
- The best formats for latitude and longitude coordinates include decimal degrees: 44.4604788, -110.8281375
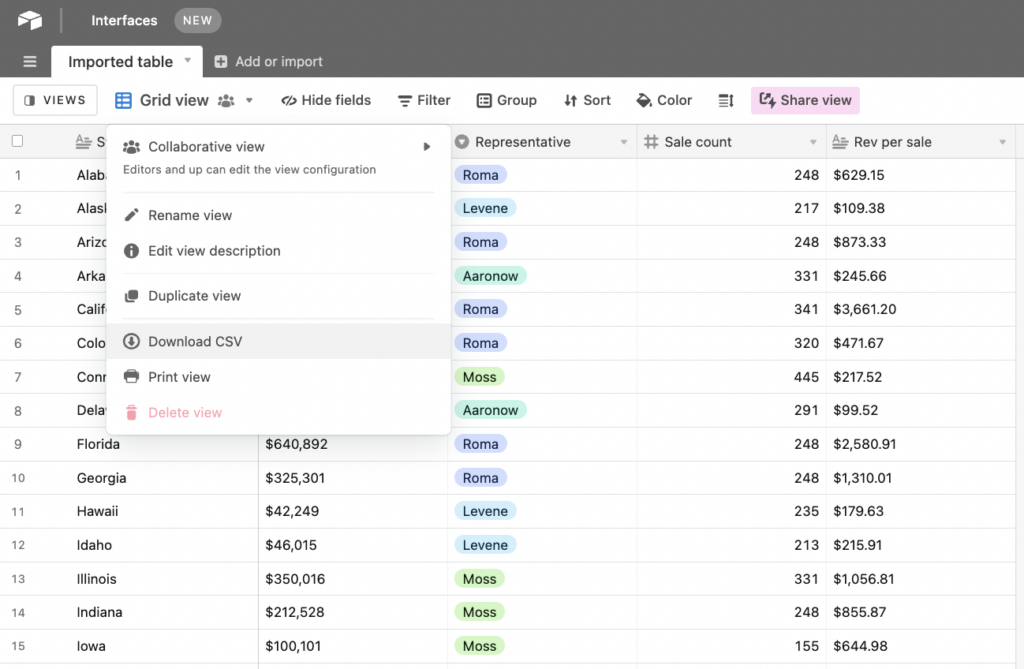
- Then, download your Airtable base as a CSV
- Open your web browser and navigate to batchgeo.com
- Drag and drop your downloaded file to the location data box, then click Map Your Data and watch as the geocoder performs its process
- Check to make sure you have the proper location data fields available under “Validate and Set Options”
- Select Show Advanced Options to customize marker labels, colors, shapes, and map styles
- After any updates, click Make Map. When you’re done, Save & Continue
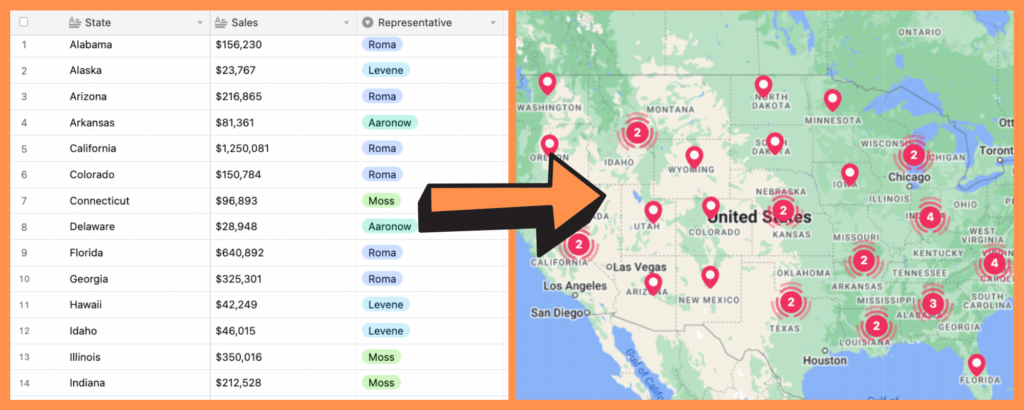
View Sales Map from Airtable Base in a full screen map
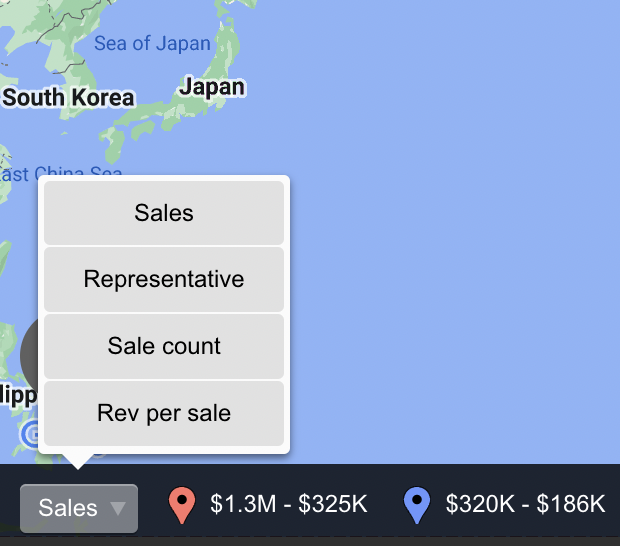
Unlike an Airtable Map, when mapping with BatchGeo, your additional data will be suggested for grouping, allowing you to sort any map by that data, such as Sales, Representative, Sale count, and Rev per sale from your Airtable base. Export your Airtable to CSV, then make your own groupable Airtable map today at batchgeo.com.
