Turn an Excel Spreadsheet Template Into a Map
Starting from scratch is hard. There’s a reason Betty Crocker cake mix flies off supermarket shelves: to save you time and help you get started. The same should be said about your favorite internet tools. This is where templates can come in handy, especially for things you find yourself repeating more than once, like making a spreadsheet of customers, identifying the locations of your leads, and mapping your geographic data.

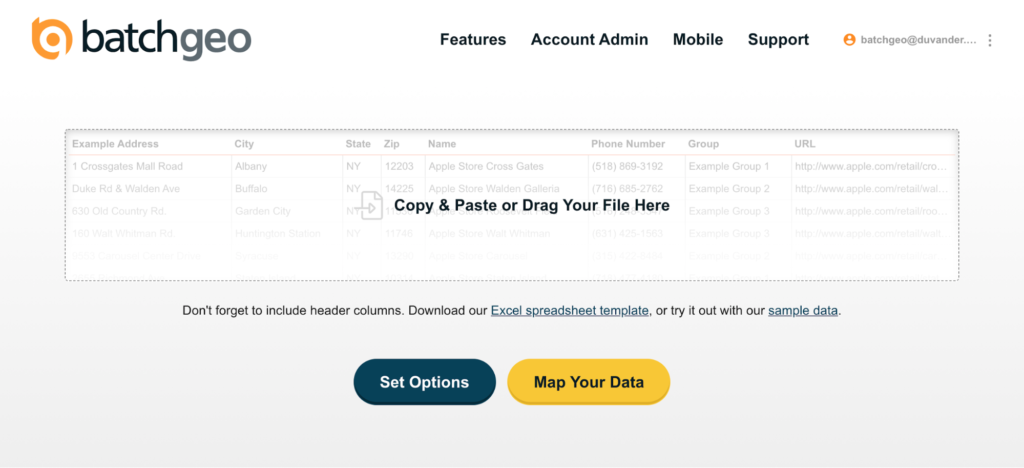
Our Excel spreadsheet template points you in the right direction on your mapping journey, ensuring your data is perfectly formatted for our mapping tool. Of course, you’ll want to replace the location data (address, city, state, and ZIP) with your own. But the template even contains suggestions on how to organize any additional data like phone number, group, URL, and email for your custom map.
Spreadsheet Template Basics: Location

You can download the Excel spreadsheet template or copy and paste it into the spreadsheet tool of your choice (like Google Sheets). Upon opening up the template, you’ll note the first four columns are entirely dedicated to location data.
These key fields include:
- Address
- City
- State
- Zipcode
You’ll want to replace the template data with your own—copy (Ctrl+C or Cmd+C) and paste (Ctrl+V or Cmd+V) it in.
However, don’t feel obligated to fill in everything; not all the address fields are required. Most mapping tools can accurately plot your points with just one location detail, though the more you have, the more accurate your geocoding will be. You can delete entire unwanted columns from the template by right-clicking the column letter and opting for “Delete.”

As you’ll also note in the template, it’s best if each part of the location has its own column. For example, if your data is in the form of 1 Crossgates Mall Road Albany, NY 12203, most tools will do their best to interpret it. However, you can separate it into individual columns to be explicit, which reduces errors. To learn how to do that, see our article Simplify Complicated Data in Excel. Otherwise, continue on for how to use the template to prepare your data for mapping.
Interactive Maps Made Easy
Sign Up NowInclude Your Location’s Name

Column E of the template is the name of your places that people will recognize. That way you don’t have to remember locations by their address. You’ll be able to use this information later to identify your locations on your map. For example, you could put a customer name or company name in this field.
You can copy (Ctrl+C or Cmd+C) and paste (Ctrl+V or Cmd+V) your own location names in place of the examples. The name of your location(s) is the last of the essential info you’ll need, though there is still some information that’s extremely helpful to have.
Add or Delete Additional Information
In addition to the necessary information about your locations, there’s additional data you may wish to include. Some suggested options are included in the template, such as:
- Phone number
- Group
- URL
- Deal value
- Sales volume

You can easily remove ones you don’t need by right-clicking the column letter and selecting “Delete.” You can also add your own columns to the spreadsheet (right-click → Insert). Say, Store Manage or whatever suits your data.
What happens to this additional data on your map? In addition to appearing in the info window, you’ll be able to group and filter what’s visible by any of your data once you make your map.
Make Your Custom Map
By using the Excel spreadsheet template, you’ve avoided starting from scratch, saving you ample time. Your spreadsheet is now perfectly primed to make a custom map just like the one below.
View Apple Stores Example in a full screen map
You can follow the simple steps below to make your own:
- Open your spreadsheet
- Select (Ctrl+A or Cmd+A) and copy (Ctrl+C or Cmd+C) your data
- Open your web browser and navigate to batchgeo.com
- Click on the location data box with the example data in it, then paste (Ctrl+V or Cmd+V) your own data
- Check to make sure you have the proper location data columns available by clicking “Validate and Set Options”
- Select the proper location column from each drop-down
- Click “Make Map” and watch as the geocoder performs its process
Find our Excel spreadsheet template on the homepage. You can refer to it each time you want to make a new map to ensure you’re on the right track.
Now that you know how to manipulate the template for your use, turn your own data into a customizable map with our spreadsheet template today.
