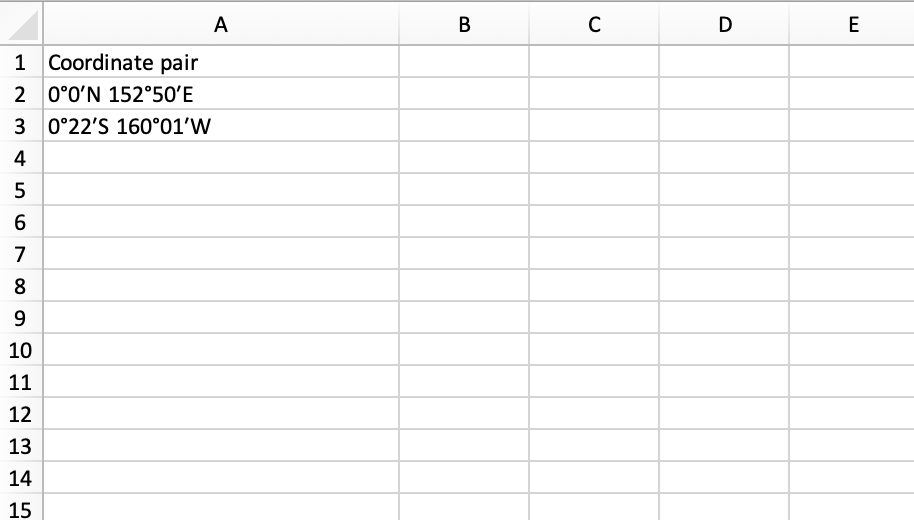
How to Convert Latitude and Longitude to Decimals in Excel
Put your finger on a globe and drag it across. Do you end up pointing at a horizontal or vertical line? These geographic coordinates are invisible on the actual planet yet used on maps and globes everywhere to pinpoint specific locations. However, sometimes these very helpful lines are in an unhelpful format. Whether you’d rather your latitude and longitude coordinates be in decimal degrees (DD) or degrees, minutes, and seconds (DMS), Excel makes it easy—no math required.
We’ll cover exactly how to convert the coordinates into decimals (or go from decimals to degrees) in a matter of steps. But first, you’ll want to ensure latitude and longitude are in individual columns.
Move Your Coordinates
Before you can convert your coordinate pair into the format you want, you’ll need to ensure latitude and longitude, along with the degrees, minutes, and seconds of each are in separate Excel columns. Why can’t we do this manually? Imagine you have 200+ rows of coordinate pairs. You need a way to select an entire column and separate its components at once.
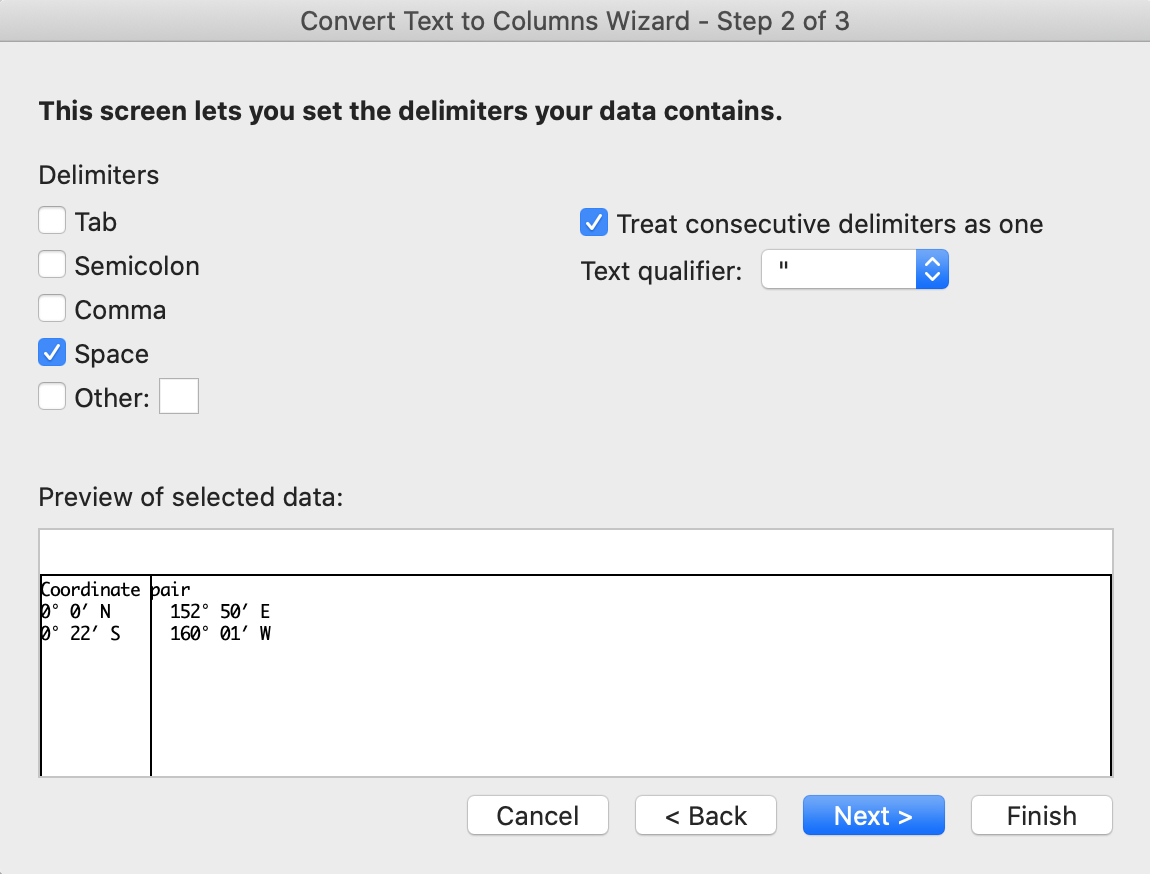
One of the easiest methods is Excel’s ‘Text to Columns’. The tool enables you to identify a point in your text that Excel can separate for you. Let’s see how this popular Excel tool helps us manage our coordinates.
Use Excel’s Text to Columns to Separate Lat and Long
The first thing we’ll want to do is separate the coordinates into different cells. A geography reminder: latitude typically comes first, followed by longitude). To get started:

- Select the cells you’d like to separate
- Navigate to Excel’s “Data” menu
- Select “Text to Columns…”
- In Step 1 of the Text Wizard, identify whether you want to separate your data by Delimited characters (commas, tabs, etc between your data) or Fixed width (moving lines between the fields)
- Step 2 is where you’ll determine the specific part of your text to separate (the Space in our example)
- In most cases, you can click finish and be done
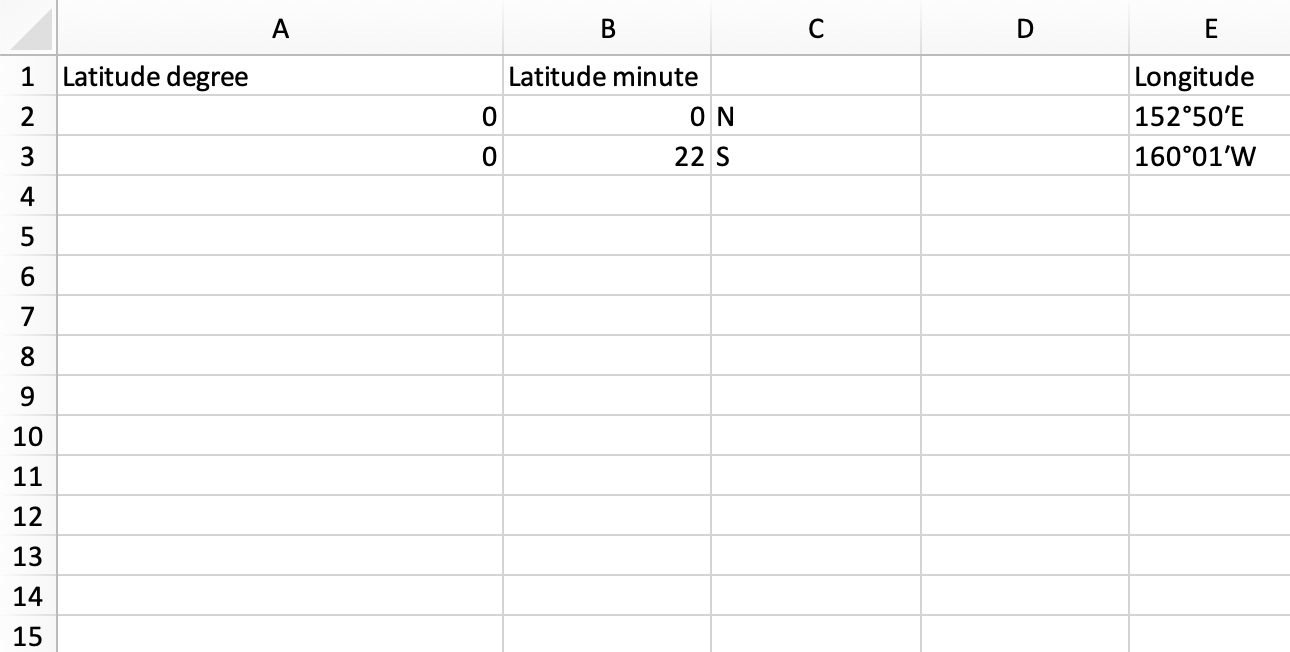
Amend your headings to better fit your updated data and the result is separated latitude and longitude coordinates. Now let’s apply the same steps to separate the degrees and minutes (and seconds if you have them!) of each coordinate.
Interactive Maps Made Easy
Sign Up Now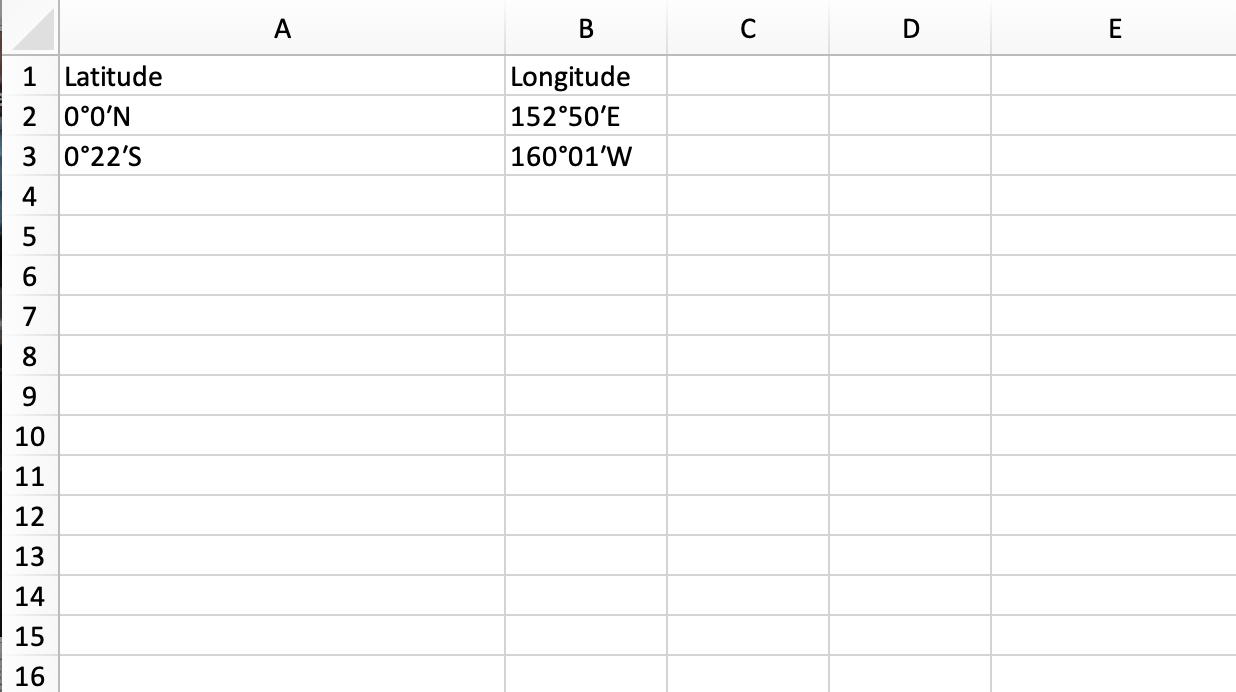
Use the Same Tool to Isolate Degrees, Minutes, and Seconds
Now that we have latitude and longitude in different cells, we can separate our data even further. We’ll want to divide the coordinates into individual columns for degrees, minutes, and seconds. This will come in handy for converting into decimals later.
Let’s get started:
- Optional As we delve deeper into Text to Columns, you may find it helpful to copy the character(s) already in your spreadsheet (like °) instead of scouring the web or your Excel menu for the Special Characters we often see with coordinates
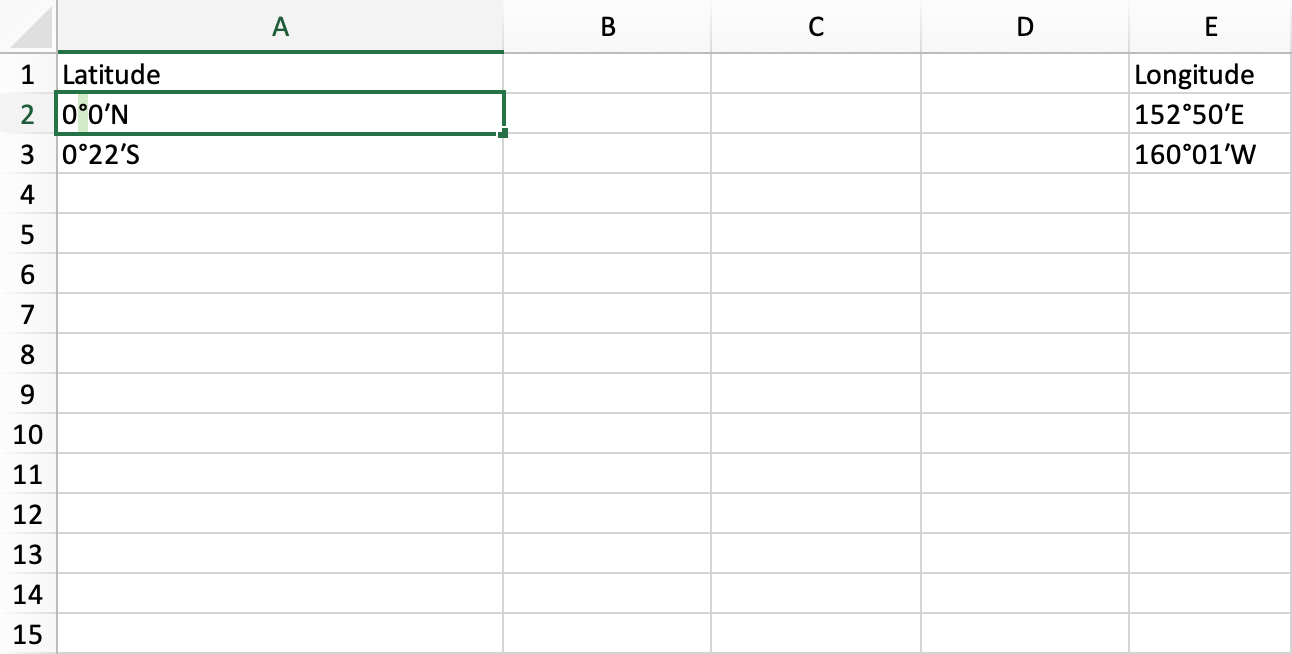
- Select your desired cells (either your new latitude or longitude column), ensuring there are a few columns to the right of either
- Once again, navigate to Excel’s “Data” menu
- Select “Text to Columns…”
- Choose between the two data types in Step 1 of the Wizard
- Determine what character or space to separate the degree (° in our example) in Step 2
- Click Finish
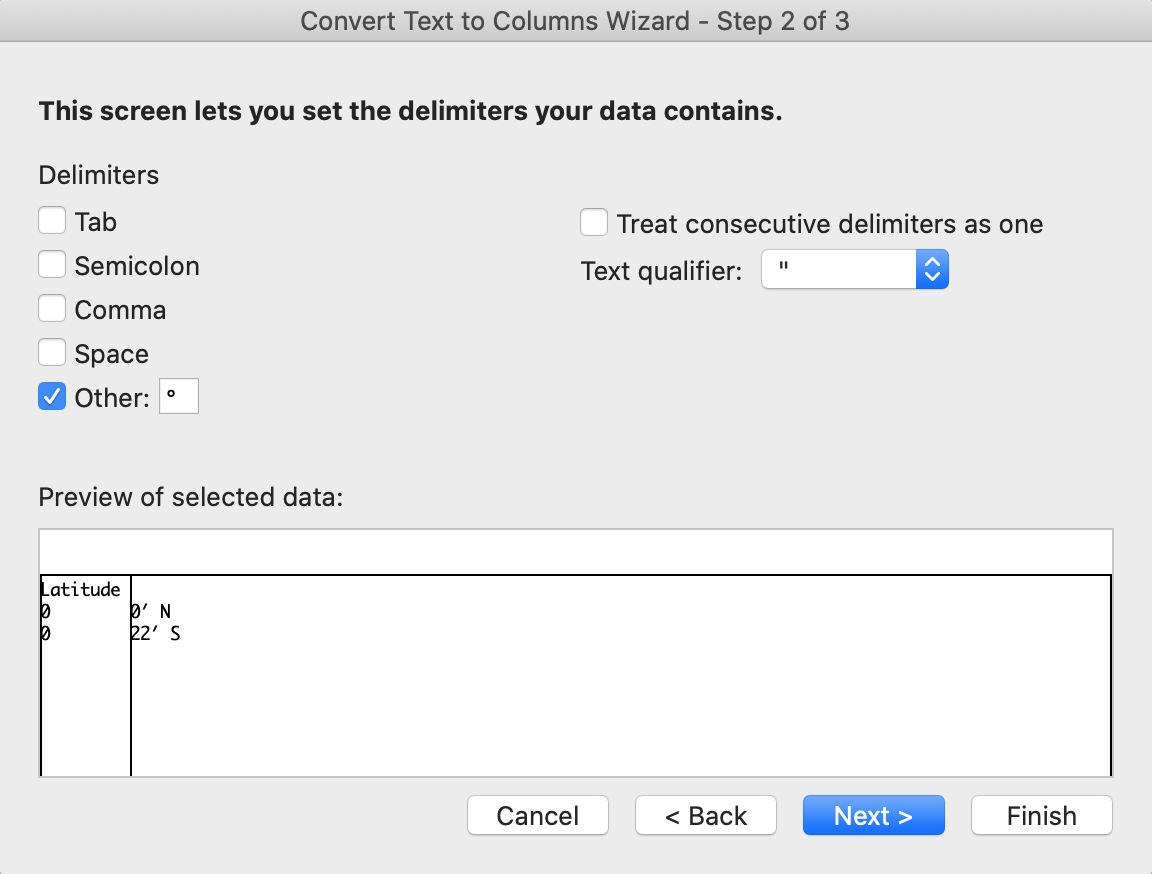
Now that we have degrees set, we’ll do the same steps above to separate the minutes (′) and would repeat if our coordinates contained seconds.
There we have it! Simply replace the headings with something more apt and you’re good to move onto the next step: conversion. You can also discover even more Excel skills in our Simplify Complicated Data in Excel Spreadsheets post.
Convert Latitude and Longitude to Decimals in Excel
With your data in separate columns, there’s nothing to stop you from converting your coordinates to decimals. As noted in our Latitude and Longitude in Excel: Calculate Distance, Convert Degrees, and Geocode Addresses post, the formula for doing so is:
=Degree+Minute/60+Second/3600
To use it in Excel, follow the steps outlined here:
- Add a heading (such as Decimal) to a blank column
- Copy and paste the formula above into a cell under your new heading
- Change the degree, minutes, and second placeholders in the formula to the corresponding cell number (i.e. A2)
- Drag or copy the formula down the rest of the column
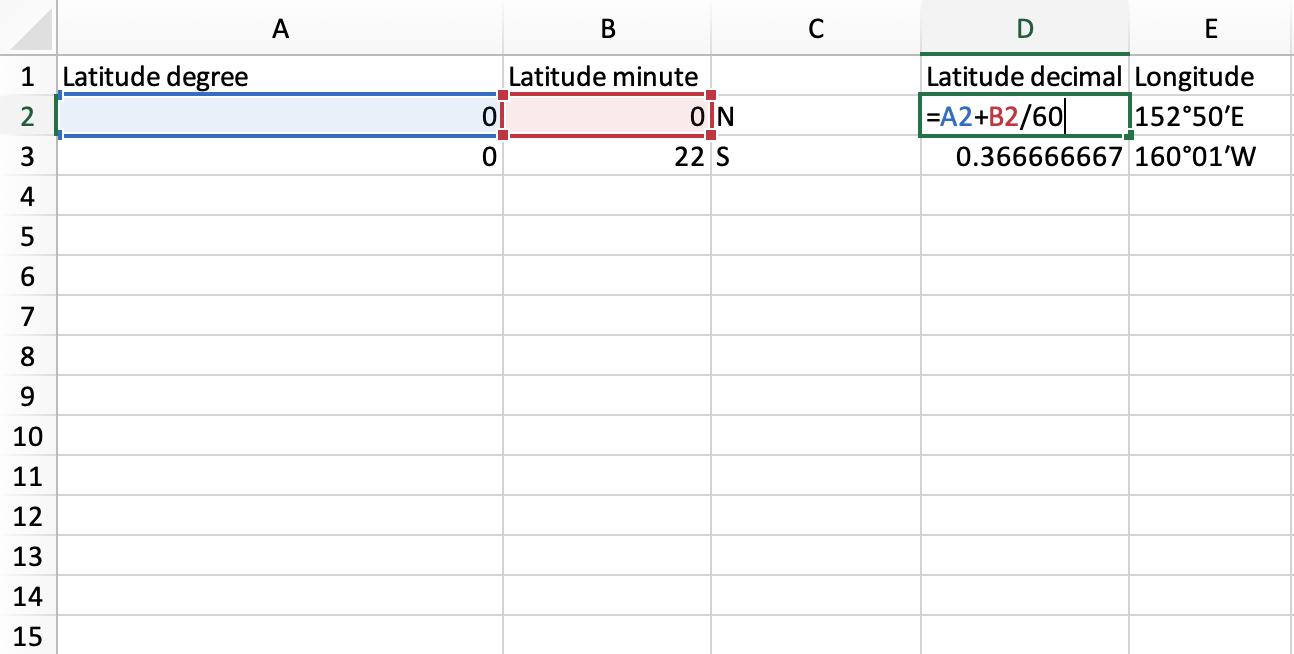
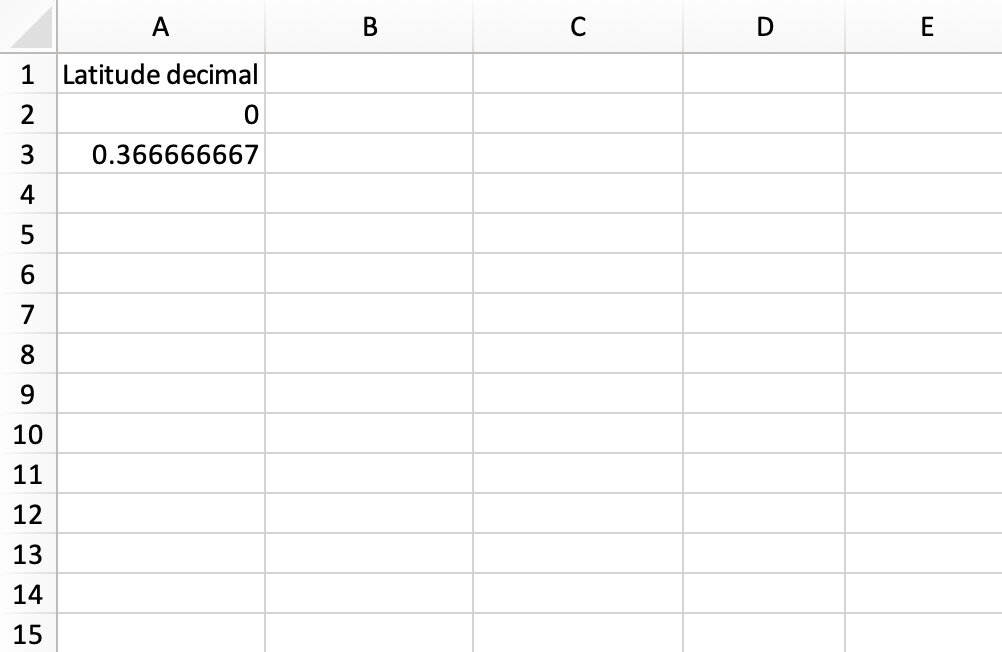
There you have it! Your DMS coordinates are now in a decimal format. But what if you want to transform decimal coordinates back to DMS? We’ll go over that as well.
Excel Decimal Degrees to DMS
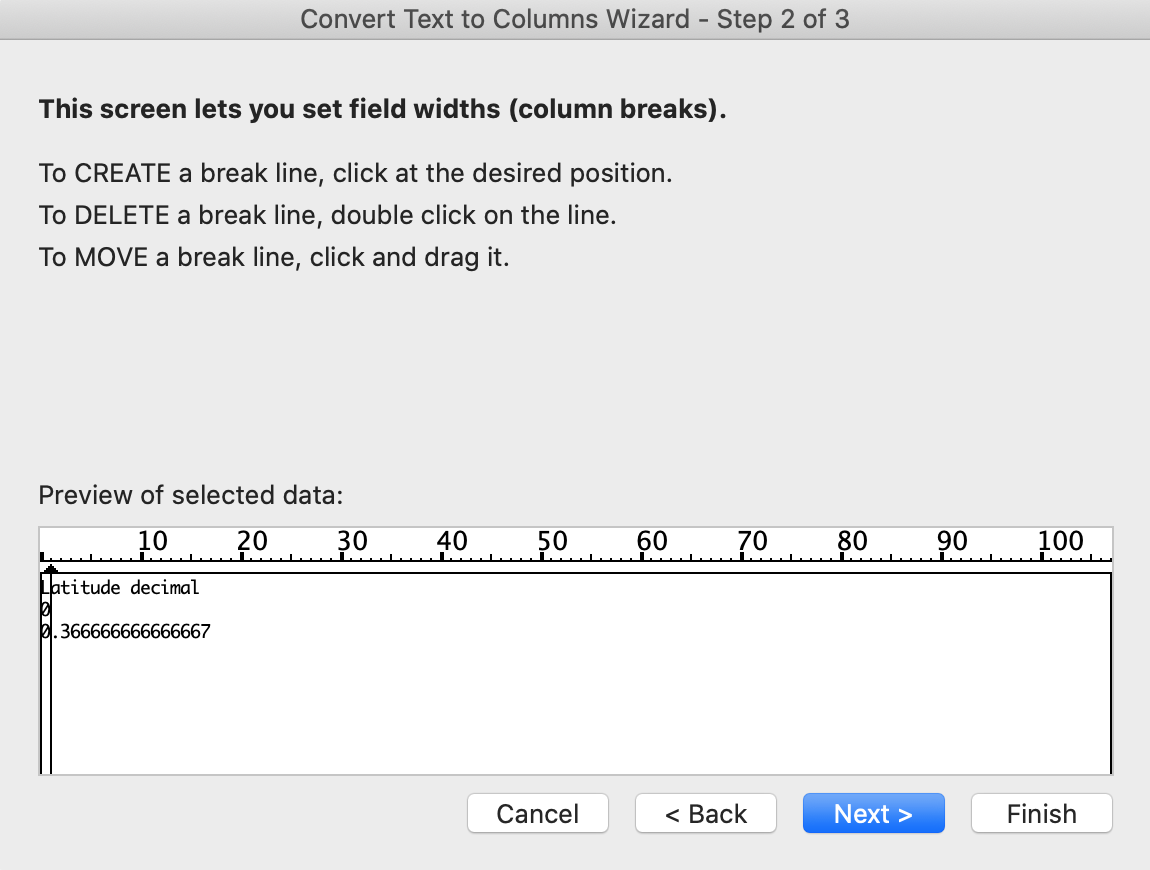
If you need to reverse the change from DMS to decimal or you started with unwanted decimals, here’s how to go about it.
- Select the decimal column
- Navigate to Excel’s “Data” menu
- Select “Text to Columns…”
- Opt for Fixed width in Step 1 of the Text Wizard
- Add a line before the decimal point
- Finish
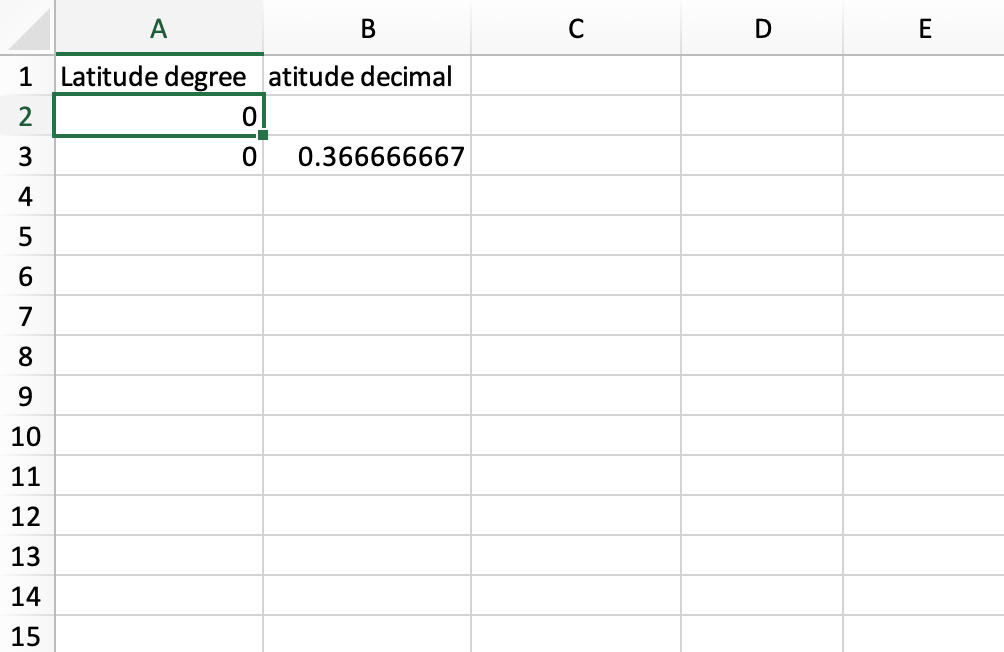
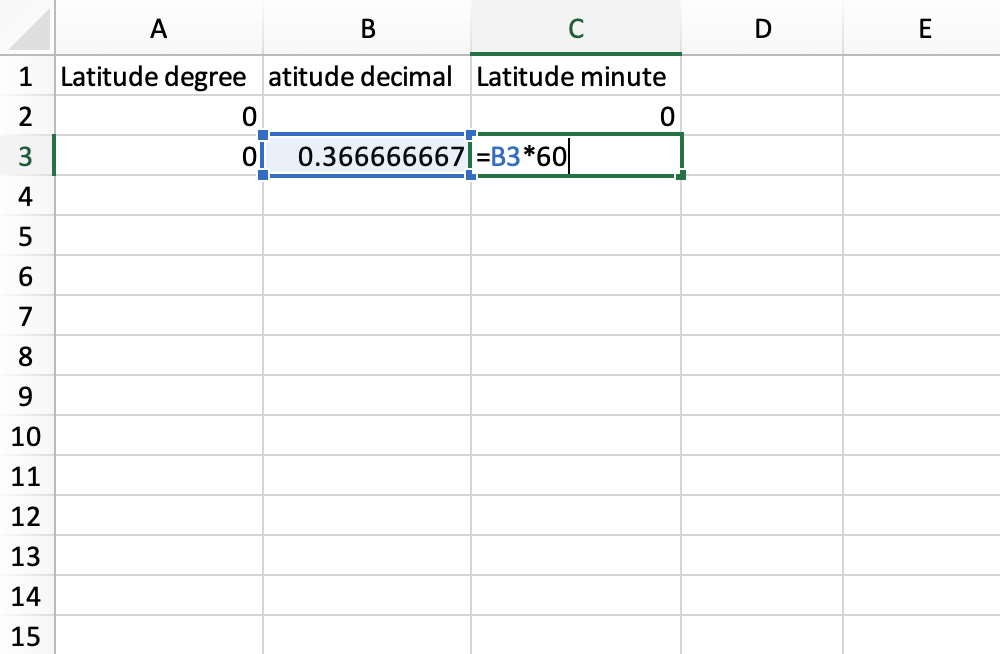
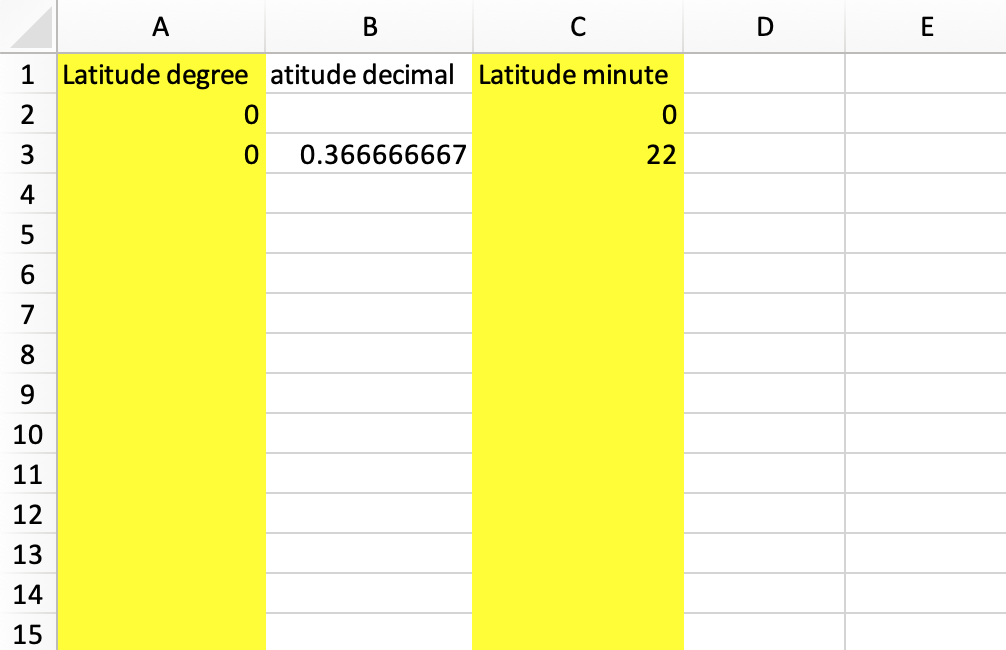
The first column now houses your degrees. As for minutes, take your remaining decimal and multiply it by 60 in a new column. Drag down to the rest of the cells.
If you were working with seconds, you would once again take only the decimal of the minutes and multiply it by 60 in a new column. You could then use =CONCATENATE to put it all together.
We’ve gone back and forth between degrees, minutes, seconds, and decimals. While we could continue to do this all day long thanks to Excel’s tools, there’s a better use of our time.
Visualize Your Lat + Long Points
After converting latitude and longitude to your desired format, your points are sitting pretty in your spreadsheet. But there may be a better place for your data.
With a custom map, you can visualize your latitude and longitude data and filter out what you want to see at any given moment. Take a look for yourself on our example map below.
View Top 100 Stores of 2019 in a full screen map
Zoom in and out of your locations with a double click of your mouse. Different colored markers represent the various values of your data. Get started with better data visualization today at batchgeo.com.
