Add Your Geocaches to an Excel Spreadsheet
Buried treasure isn’t just for pirate-obsessed children. People of nearly any age get excited about the prospect of hidden gems. In the case of geocaching, it’s small containers (called “caches”) filled with trinkets.
Those who participate in this (mostly) free pastime follow given latitude and longitude coordinates and hints in order to find what’s hidden. Once discovered, geocachers exchange a different trinket for one in the cache for the next hunter to find.
One of the most popular places to search the millions of geocaches worldwide is Geocaching.com. Millions of players use the Geocaching app and GPS-enabled devices to find geocaches.
You can also export your geocaching finds from the site, allowing you to visualize them in other formats (such as a spreadsheet) and share with others.
We’ll show you how, as well as how to put your new spreadsheet of geocaches on a map you can share with others.
Download a File from Geocaching.com
Before you can add the data of your geocaching finds into a spreadsheet tool like Excel or Google Sheets, you must first download your information from Geocaching.com.
Only Geocaching Premium members can download multiple caches in any given file type. Those with Premium also have the option to download the more detailed GPX file of all of their geocaches. This contains all of the typical information (name, coordinates, type), along with data about placed date, placed by, container size, and much more.
To obtain this file, Geocaching.com recommends those with Premium generate custom downloadable geocache queries (which can contain up to 1,000 caches at a time), called Pocket Queries.
- Sign in to your Premium account or sign up at Geocaching.com
- Navigate to the Pocket Query page
- Below your regular Pocket Query options, locate the My Finds sections
- Select Add to Queue to run it
This returns all geocaches you found, including archived geocaches, and your log entries.

Allow a few minutes (or more, depending on how many Geocaches you’ve found) for your Pocket Query to be ready. Geocaching.com will send you an email.
If you have Windows, tools like GSAK may simplify this process. Now let’s move on to the second step in exporting your geocaching finds to Excel: converting the file you just downloaded to something Excel will accept.
Interactive Maps Made Easy
Sign Up NowConvert Geocaching Files to Excel
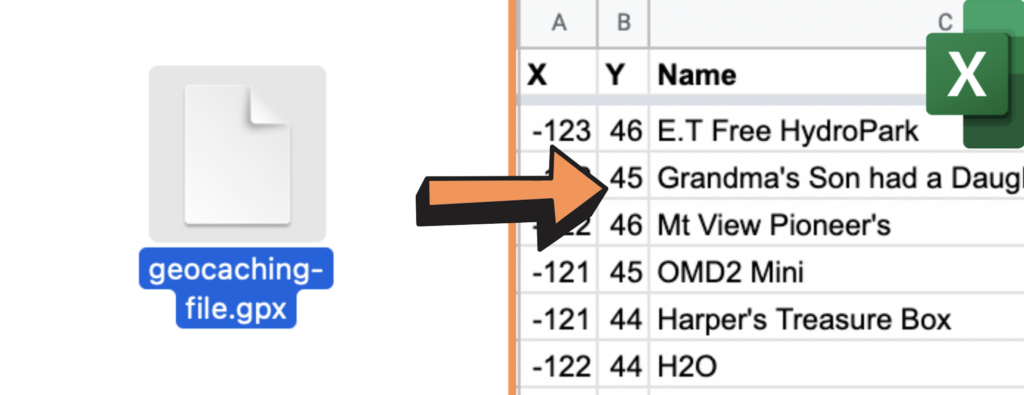
To make your newly downloaded GPX file usable, you’ll need to export the coordinates into a list format. You can do that by diving into the data yourself, or find a tool like this to convert to an Excel format with separate columns for all the information. Look for it amongst the waypoints, since GPX also stores route data.
Once converted, you can remove certain columns from your sheet, especially those that are blank. Along with a bit of Excel magic (like Split text to coulmns), you can ensure your spreadsheet only contains the geocaching data you want:

Note that a Geocaching.com My Finds Pocket Query will only return Geocache Found, though there are a variety of other queries you can make that will result in other geocache statuses. This would come in incredibly useful if you then created a map to view and filter your geocaches.
Before you create a map, it can be helpful to create a single column to hold your coordinates, rather than separate latitude and longitude fields. You can do this in Excel by combining separate columns. For example, create a column in the far left called “coordinates,” then use an Excel function to combine the next two columns (“x” and “y” in the screenshot above):
=CONCATENATE(C2, ", ", B2)
Then copy that cell and paste it in every row below to create coordinates like: 46, -123
Now you’re ready to create your map!
Track Your Geocache Scores on a Map
Discovering a geocache can be exhilarating. Why not elongate the excitement by viewing all of your finds on a map?
You can copy and paste the entire spreadsheet (including the headers) into our mapping tool to generate a map like this:
MAP:
View Geocaching Example in a full screen map
- Open your Geocaching spreadsheet from the previous section
- Select (Ctrl+A or Cmd+A) and copy (Ctrl+C or Cmd+C) your data
- Open your web browser and navigate to batchgeo.com
- Click on the location data box with the example data in it, then paste (Ctrl+V or Cmd+V) your own data
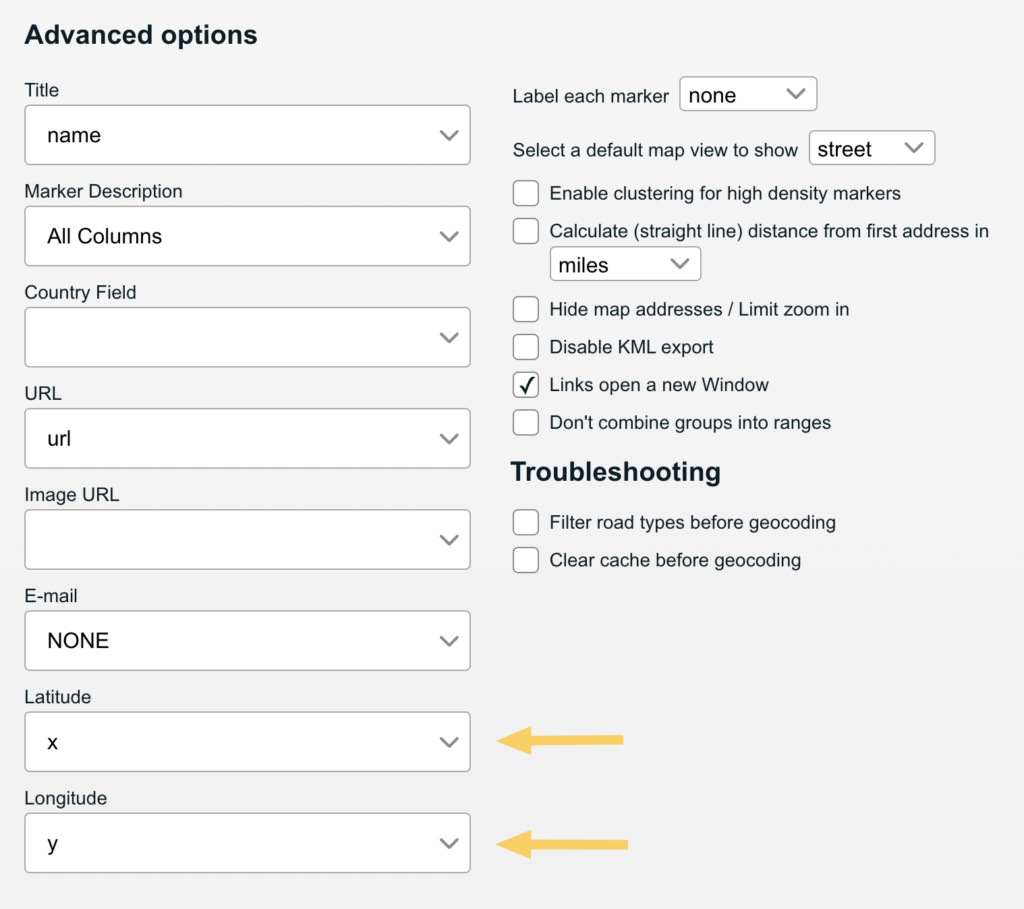
- You’ll want to navigate to the advanced options to select your latitude and longitude columns
- Review other automatic options to make sure your data is accurate
- Click “Make Map” and watch as the geocoder performs its process
Geocaches are only the start of the data you can put on a map. Ready to make your own? Get started for free at batchgeo.com.
