If you’ve never had to deal with duplicate data, count yourself lucky. It’s a common issue, especially when you have many locations on a spreadsheet. More often than not, you’ll want to spot them quickly and get rid of them efficiently.
In this post, we’ll explore the best methods for identifying and removing duplicate locations in Excel or Google Sheets. However, since sometimes multiples of a location aren’t truly duplicates, we’ll also talk about how our tool treats this kind of data to avoid confusion for your map visitors.
How to Identify and Remove Duplicate Locations in Excel
Excel offers multiple ways to help you find duplicate data, from highlighting to using formulas.
Considering you likely want to eliminate your duplicate data, we’ll skip the former method and delve into the latter. Specifically, we’ll show you the easiest way to remove duplicates in Excel and a simple Excel formula (COUNTIF), which allows you to sort by identified duplicates and delete them all at once.
The easiest method to remove duplicates in Excel is by using the “Remove Duplicates” functionality. Simply click the Data tab at the top menu and then “Remove Duplicates.”

Select the column you want to check for duplicates and click “OK.”
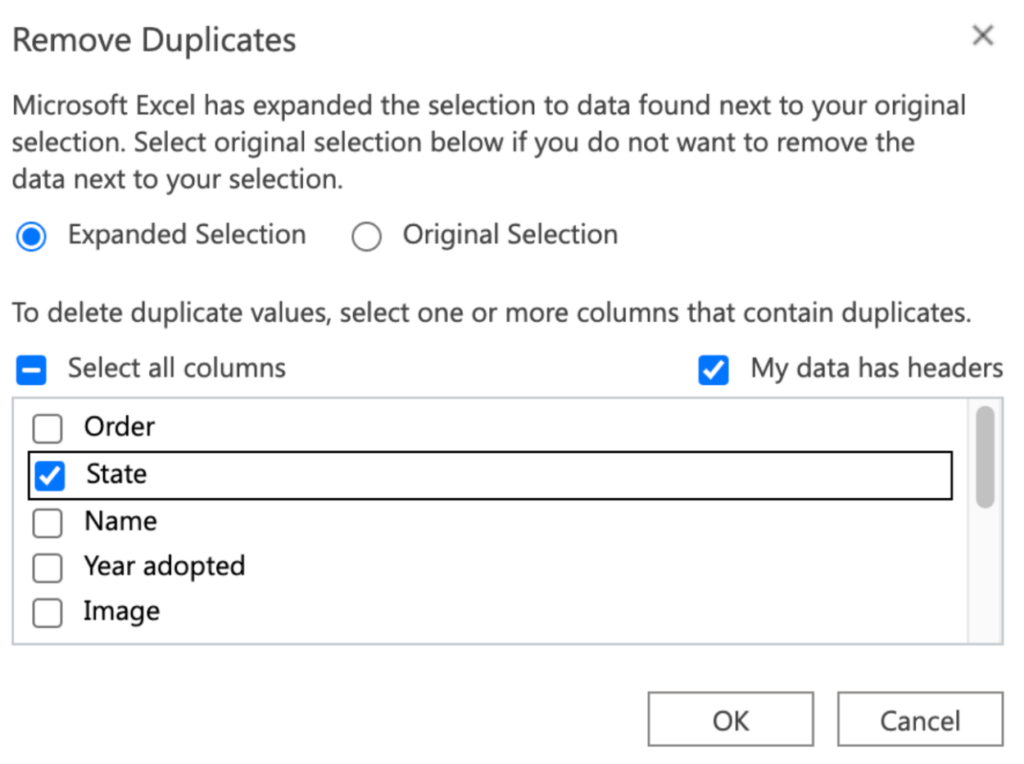
That’s all you need to do. Excel will automatically remove the rows with a duplicate in that chosen column and let you know how many unique rows remain.
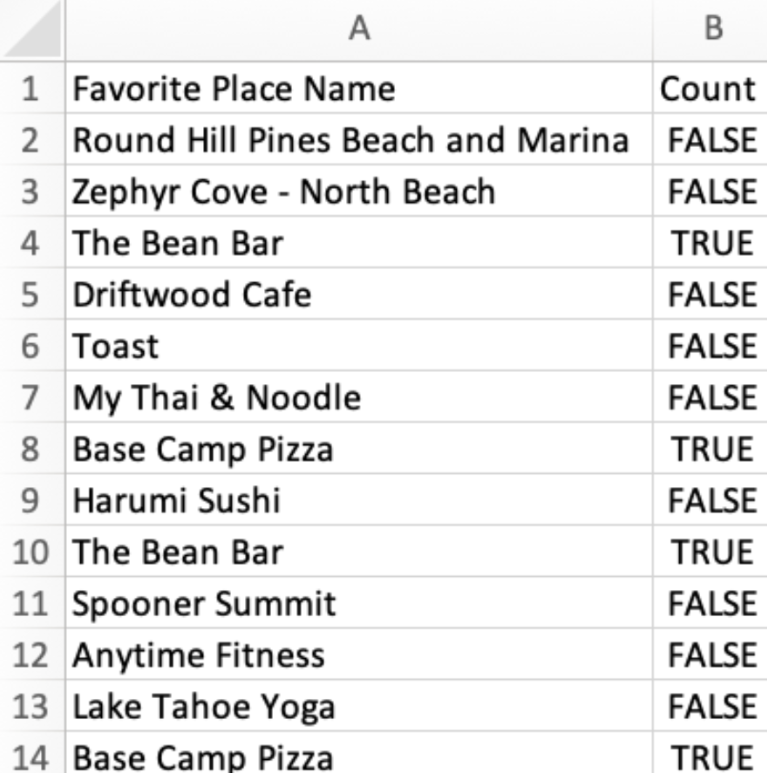
What if you want to review the duplicates before they’re removed? In that case, use =COUNTIF to “count” which cells contain data that appear more than once in the spreadsheet. The resulting values can either be “TRUE” (indicating duplicate data) or “FALSE” (showing non-duplicate data).
To begin, add a heading like “Count” to a blank column, then follow these steps:
- Copy and paste the following formula into the first cell of the blank column:
=COUNTIF(A:A,A1)>1. - Change the A in the formula to coincide with the letter of the cell column in which you wish to find duplicates.
- Drag the cell’s contents down to the cells below.
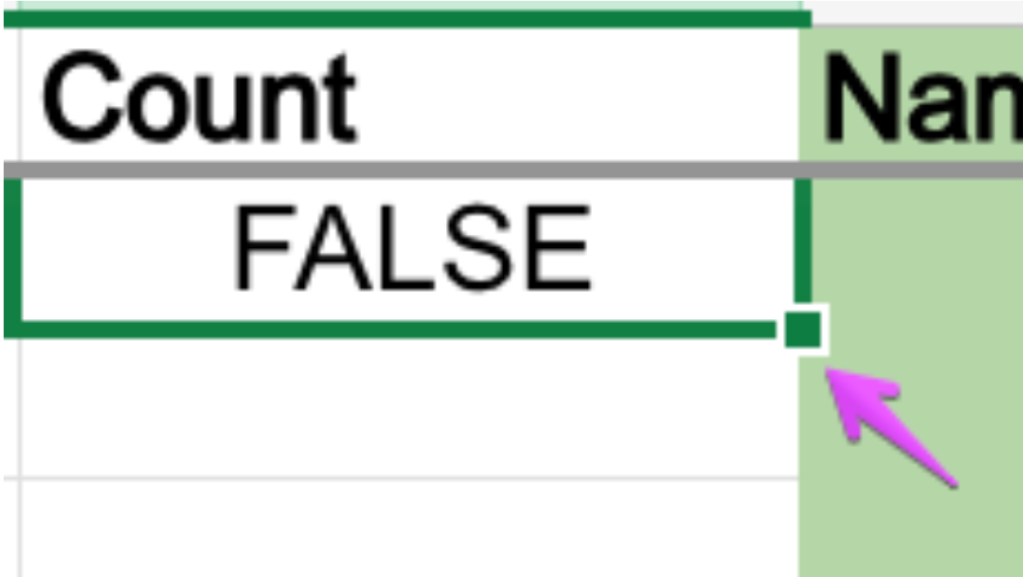
If you’re unsure how to drag the cell’s contents down, click the results cell from your formula; in the bottom right corner, grab the small square and highlight every other row you want to check for duplicates.
Your duplicate locations will appear in the new “Count” column as “TRUE,” while non-duplicate locations will appear as “FALSE.” Next, you can sort this column to see the duplicates together: Highlight it in its entirety and, in the Data tab, choose “Sort.”
You can now remove all duplicates by highlighting the “TRUE” rows, right-clicking, and selecting “Delete Rows xx-xx.”
How to Identify and Remove Duplicate Locations in Google Sheets
While identifying and removing duplicates in Google Sheets is similar to Excel, the process is slightly different in small, but important ways.
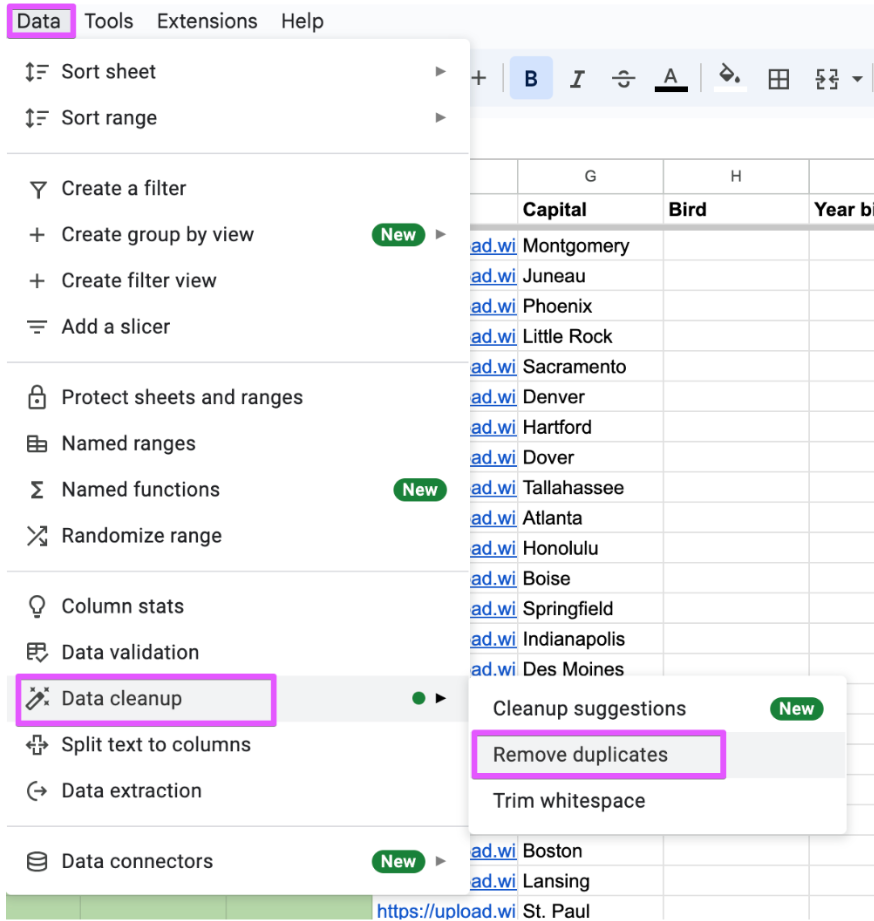
Like Excel above, Sheets has a feature to remove duplicates. Highlight the columns you want to search and click on the Data menu, then “Data cleanup,” and finally, “Remove duplicates.”
Sheets will prompt you to verify the columns; once you do, it will remove every row with a duplicate found in that column. That’s it!
If you want to review the duplicates before deleting them, the process is much like we described above in Excel. Use the ‘=COUNTIF(A:A,A1)>1’ formula, sort, and remove the duplicate rows marked true.
What About Duplicates that Shouldn’t Be Removed?
While the methods outlined in the previous section remove duplicate locations from your data, there are instances when seemingly identical locations are not actually duplicates. In such cases, you won’t want to remove the data. Instead, you’ll go ahead and map them.
Here’s what it looks like to map them using the BatchGeo tool.
View US State Capitals, Flowers, and Birds in a full screen map
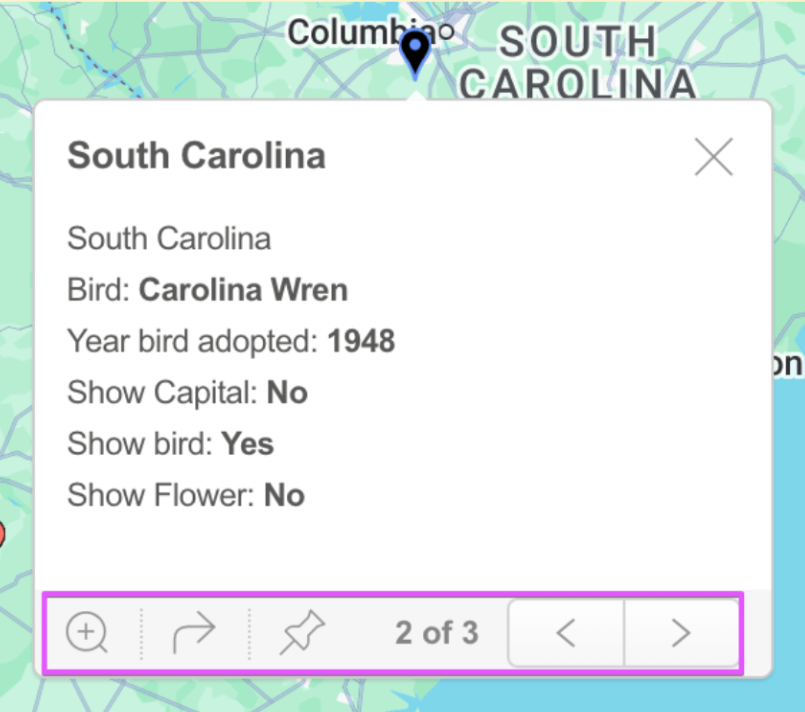
When multiple locations are intentional and not duplicates, as is the case for our State Capitals, Flowers, and Birds Flash Cards above, a single marker on the map can represent multiple data points.
Clicking that marker brings up a window, at the bottom of which are data points represented by that marker, along with arrows. Click on the arrows to see each data point.
Check it out, along with all the other cool features you can use to map your location data with BatchGeo.