Make a Custom Google Map of Your Data and Display It on Your Website
As one of the largest companies in the world, Google offers products and services for nearly everyone. Among their most popular is Google Maps. Most of us know how to use their tool to get directions or find a location—but what if you wanted a more custom option?

If you’re a developer or you just have some knowledge of APIs, you can display your own data on a Google Map by using the Google Maps API. This way, you can create custom maps and still have access to the features we associate with Google Maps.
In this post, we’ll show you how to make a Google Map using your data, which starts with obtaining an API key. We’ll also walk you through what to do after you get your key, for which you’ll need some knowledge of JavaScript and at least a beginner’s understanding of HTML and CSS.
At end, we’ll provide an alternative to making custom Google Maps that doesn’t involve an API key nor Javascript.
How to Get a Google Maps API Key
In order to use Google’s official platform to make custom maps, you need a working Google Maps API key. If you don’t know what an API key is or you just want an easier way, you can always skip to the alternative way of making a custom Google Map.
For those who want to continue, note that you can re-use the same Google Maps API key if this isn’t your first time doing so. Otherwise, we’ve outlined the basic steps to get a Google Maps API key below:
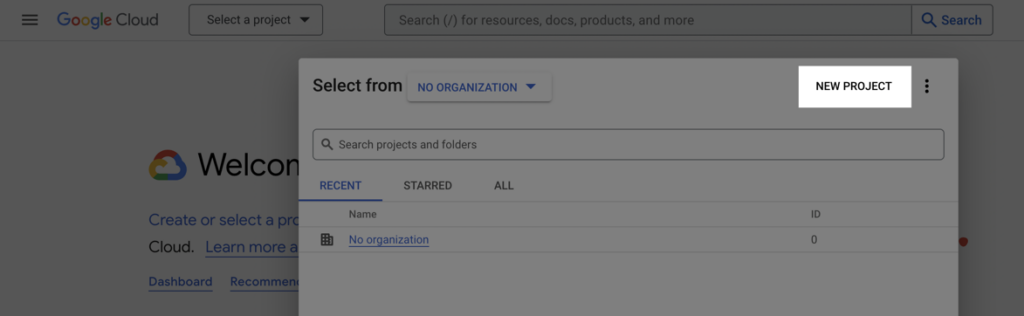
- Navigate to the Google Cloud Platform Console and create a “New Project.” If you own an existing one, you can use that instead.
- Next, go to the Google Cloud Platform Billing page and add a payment method for your project. You’ll likely never be charged, unless your usage is particularly high. However, Google does make you add this payment option before you can continue.
- On the Google Maps Javascript API page, click “ENABLE.” Ensure your project is selected. Then, do the same on the Google Maps Geocoding API page.
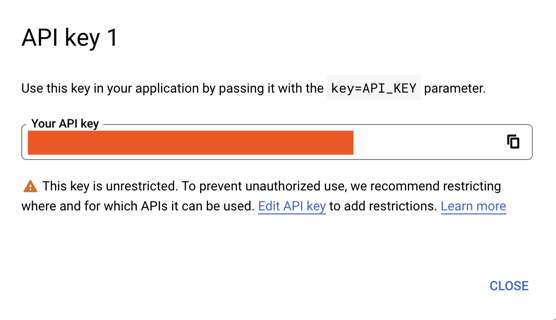
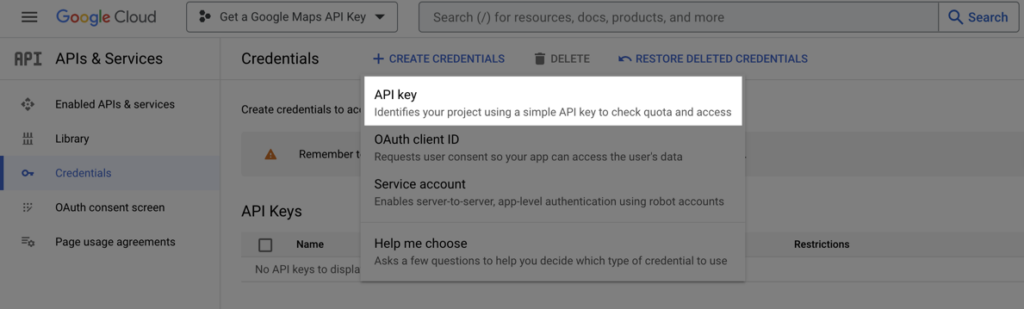
- Finally, head over to this page, click “CREATE CREDENTIALS” > “API key” > “Copy to clipboard.”
Interactive Maps Made Easy
Sign Up NowWe’ll keep this API key handy for our next step in making a custom Google Map.
Map A Google Map Using Your API Key
From here, there are just three more steps before you can finalize your a custom Google Map:
- Create an HTML web page
- Add a map with a marker
- Add your API key
For the most basic HTML page, Google provides code for you to copy into your integrated development environment (IDE).
In that code, where it says src="https://maps.googleapis.com/maps/api/js?key=YOUR_API_KEY&callback=initMap", add the API key you obtained from the previous section, replacing YOUR_API_KEY.
Next, you can use the following code from Google to add the map, using an example marker of Uluru in Australia:
// Initialize and add the map
function initMap() {
  // The location of Uluru
  const uluru = { lat: -25.344, lng: 131.031 };
  // The map, centered at Uluru
  const map = new google.maps.Map(document.getElementById("map"), { zoom: 4, center: uluru, });
  // The marker, positioned at Uluru
  const marker = new google.maps.Marker({ position: uluru, map: map, });
}
window.initMap = initMap;
The resulting map will look something like this:
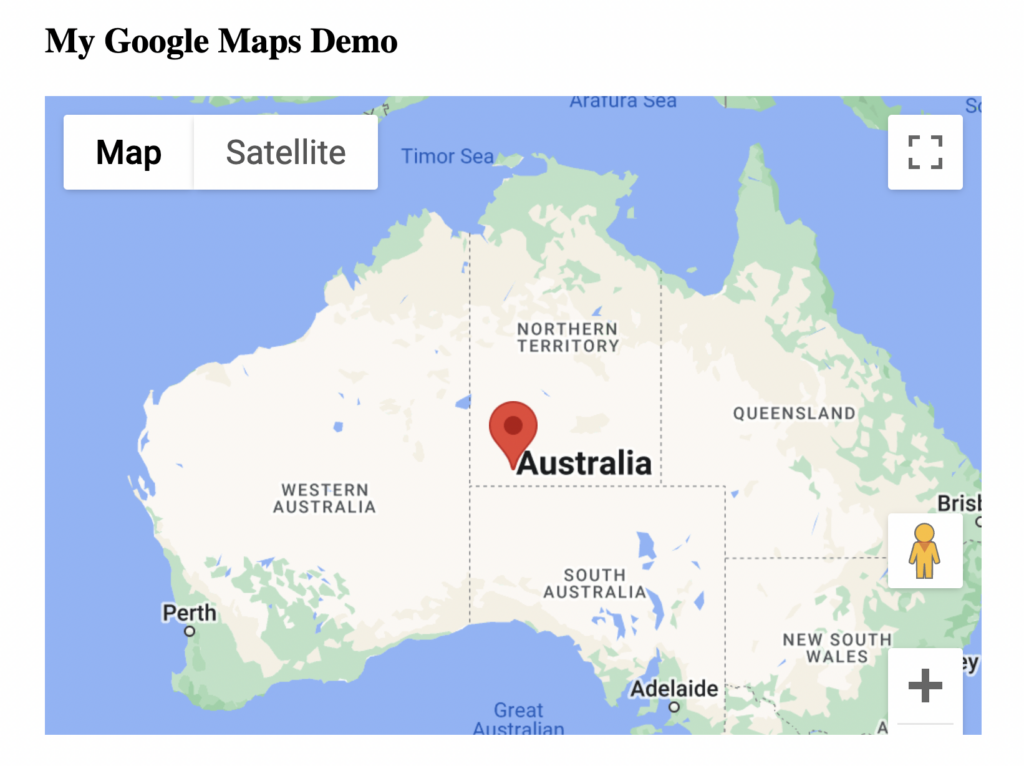
Now you’ll need to add the rest of your data, including the latitude and longitude coordinates for each location. If you don’t have the coordinates for each place, you’ll need to look them up. If you have many places to map, you’ll be better off storing them in a database. It’s a lot of effort if you want to simply get a list of addresses on a map—which is why the next section might be a better fit for many map-makers.
An API-Free Custom Google Maps Alternative
Even the most experienced developer may not wish to jump through all of the Google interface’s hoops. So for a custom Google Map alternative with no API key required, try our online mapping tool.
Since we can skip the steps of adding an API key and coding an HTML page and map, we can get right into copying and pasting your data into BatchGeo to make a map like the one below.
View Australian Monuments in a full screen map
You don’t even need full addresses. The map above used city and territory names for Australian monuments. Even better, include all of your spreadsheet columns and you can filter and group by certain data. Include categories, regions, or even numerical data about each location.
Here’s how to make a map with your data:
- Select (Ctrl+A or Cmd+A) and copy (Ctrl+C or Cmd+C) the data in your spreadsheet
- Navigate to batchgeo.com in your web browser
- Click on the location data box with the example data in it, then paste (Ctrl+V or Cmd+V) your own data
- Ensure you have the proper location data columns available by clicking “Validate and Set Options”
- Select the proper location column from each drop-down
- Click “Make Map” and watch as the geocoder performs its process automatically
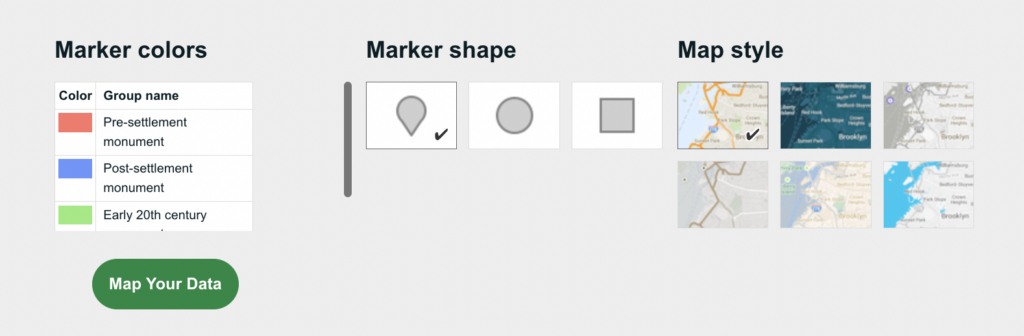
For customization beyond your own locations, you may opt to Show Advanced Options in order to choose your marker labels, colors, shapes, and map styles.
Plus, unlike with the Google Maps API, when mapping with BatchGeo, your additional data will be suggested for grouping, allowing you to sort any map by that data, such as the type of monument.

To embed a BatchGeo map, just right-click it and select “Edit Map.” Scroll down until you spot “Embed Code.” Copy the code and paste it into your website editor. For example, if you’re using WordPress, choose a “Custom HTML” block and paste it there.
Make your own custom Google Map today at batchgeo.com.
